
Using Instax instant film can sometimes be surprising. Faded images, blurs, light streaks, crackles, color tints and even completely black or white images are common defects when your pictures aren’t developed correctly once it is ejected from the camera.
The best way to develop instax film is to keep it out of direct sunlight while developing. To do this, shield the film from direct light with your hand until the film has fully ejected and lay it upside down on a flat surface to keep it is out of direct sunlight for the first 90 seconds of development. Shaking or touching the film during development will also damage the film.
Keep reading if you need help troubleshooting difficulties with your Instax photos and the best way to develop Instax film.
Should Instax Film Develop in the Light or Dark?

Instax film, like Polaroid Film, has light-sensitive chemicals in the film and is coated with a chemical to fix the image from light and to stop the development process when the film is ejected from the camera. The film needs to be protected from direct sunlight (UV light) to ensure best results and keep from overexposure or fading while it is developing.
To protect your Instax film during development , Fujifilm recommends covering the film with your hand as soon as it’s ejected from the camera in you are in direct sunlight (like outside on a sunny day). You could even put your hand over the slot area before the photo even comes out so it’s protected from direct sunlight as soon as it is ejected.

Once the film has stopped ejecting from the camera (don’t pull it out of the camera while it is ejecting or it will damage the film), take the film out of the camera and turn it over with the image face-down and place it on a flat surface. If you don’t have access to a location out of direct light you can protect your film from light after it ejects from your camera by putting it face down on inside a jacket pocket or inside an empty film packaging.
This should help to keep your photo from looking faded, have better and deeper color saturation, and have sharper details because the developing chemical that is spread across the image contains the opacifiers (light blockers), is given enough time to stop extra light from filtering to the light-sensitive layers below it.
Does Instax Film Need Light to Develop?
Fujifilm Instax camera film does not need to develop, so it is best to keep your film out of direct light by laying it flat with the image down when it is developing after it ejects from the camera. Once the image on the film has appeared after 90 seconds the film won’t fully develop until 10 minutes, but you can turn the film back over and look at the image since short contact with direct light won’t ruin the film at this point.
However, light is what creates the image on Polaroid film inside of your Instax camera after you press the shutter button to take a picture. The Instax film itself has 4 light-sensitive layers:
- One for black
- A layer sensitive to blue light
- A layer sensitive to green light
- A layer sensitive to red light
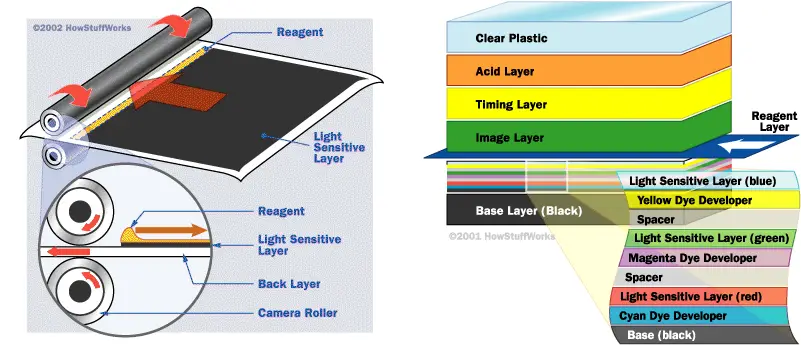
After you take the image a photo, the light sensitive chemicals within each layer will react to the wavelength corresponding to their appropriate color sensitivity.
The fraction of a second that the shutter stays open is a long enough time to capture a chemical record of light and color at the moment your picture was taken. Too much exposure to light at once will ruin the the image by overexposure creating a faded picture or possible an all white image. On the other hand, too little light will be underexposed and possible an all black image.
Is it Bad to Shake Instax Film?
Contrary to popular belief from TV shows and media (thanks OutKast!), you should not shake your instax film once it has fully ejected from the camera. The reason for has persisted is Polaroid film used to make peel-apart films that created an image and a negative. These were wet from their development chemicals and required shaking to dry.
There are two likely things that shaking Instax film does:
- It causes the photo to be overexposed
- It disturbs the chemicals in the photo
Shaking Causes the Image to be Overexposed
This first problem comes from light exposure. It’s important to cover your photograph with your hand as soon as it comes out of the camera and lay the image upside down on a flat surface once it stops ejecting from the camera because it’s at its most vulnerable to direct light. The last thing you want to do is shake your picture around and expose it to light from all directions.
Shaking Disturbs the Chemicals In and On the Photo
The second problem with shaking your photo after it is ejected from the camera is that you can damage the film. Fujifilm and Polaroid both assure their customers that shaking their instant images will create an uneven spread of the chemicals and will cause problems with the image such as having overexposed spots, blurring colors, creating bubbles, and creating creases. In addition, if your finger slips touches the image area before it has fully developed, it will create spots on the image.
Keep in mind that Instax film and Polaroids are made more for instant satisfaction rather than long-term preservation. However, if you store your instax images them correctly you can keep them from fading and enjoy them for decades.
How to Prevent Damage to Your Developing Instax Photo
Instax photos are mostly relient but you still need be careful when taking and developing images. Avoid damage to the Instax film by keeping the following precautions in mind to get the best from your images:
- Wait for the camera to stop ejecting your picture before touching and removing the film
- Take your picture carefully out of the slot by touching the larger white border while covering it with your hand to protect from UV light
- Avoid shaking your image once it has fully ejected
- Lay the picture with the image facing down on a flat surface so it is not in direct sunlight
- Don’t stack multiple photos on top of each other
It’s important not to pull the image out of the camera until the camera stops ejecting the film completely. Pulling it out prematurely, may damage the rolls in the camera that spreads chemicals over the film and cause the chemicals to spread evenly across the image as well as future images
It is also important to only touch the largest border, which is usually the furthest edge of the film opposite the camera, because touching the image area on the film while it develops will leave fingerprints as well as spots on the film.
Lastly, never lay your fresh photos on top of each other after they have ejected and while they are developing. The image surface of each photo will be very sticky until they are fully dried. Placing new photos on top of each other will make them stick together it will damage the film further when pulling them apart, possibly even tearing the film and spilling chemicals onto your hands.
How Long Does it Take Instax Film to Develop?

Once you’ve taken the picture and the film has completely ejected, the image on the Instax film takes around 90 seconds to appear and about 10 minutes to fully develop when the ambient temperature is 60℉ (or 16℃). However, the ambient temperature will greatly affect this development time.
If you take a picture while it’s colder than 60℉ (or 16℃), it takes longer for the chemicals to react as they’ve slowed down. Cold weather for the film would technically be anything under 41℉ (or 5℃) but the colder the air is around you the longer the process will take and the more likely you will have development errors like blue or green discoloration because the layer that’s sensitive to blue light didn’t fade away completely.
Conversely, taking images with Instax film when the ambient air temperature it’s warmer than 60℉ (or 16℃) the process will be speed up. Once the temperature is at or above 104℉ (or 40℃), your pictures will most likely have an orange tint.
How Long Does it Take Instax Mini Film to Develop?
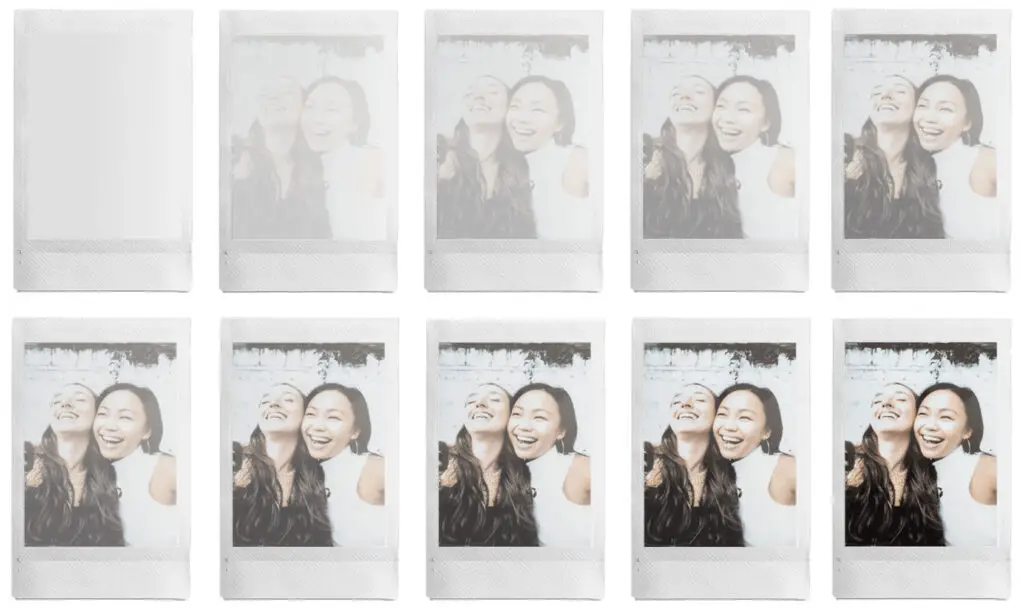
Regardless of the size of the film, it will always take an average of 90 seconds for the development to become noticeable, and then every 30-60 seconds after that, the image becomes clearer with more color saturation and contrast. At 60℉ (16℃), Instax film will likely take 10 minutes for the photo to completely develop and dry. However, if the temperature of the air is colder the film will take longer and if it is warmer the process will take a shorter amount of time.
How Long Can You Leave Instax Film in the Camera?
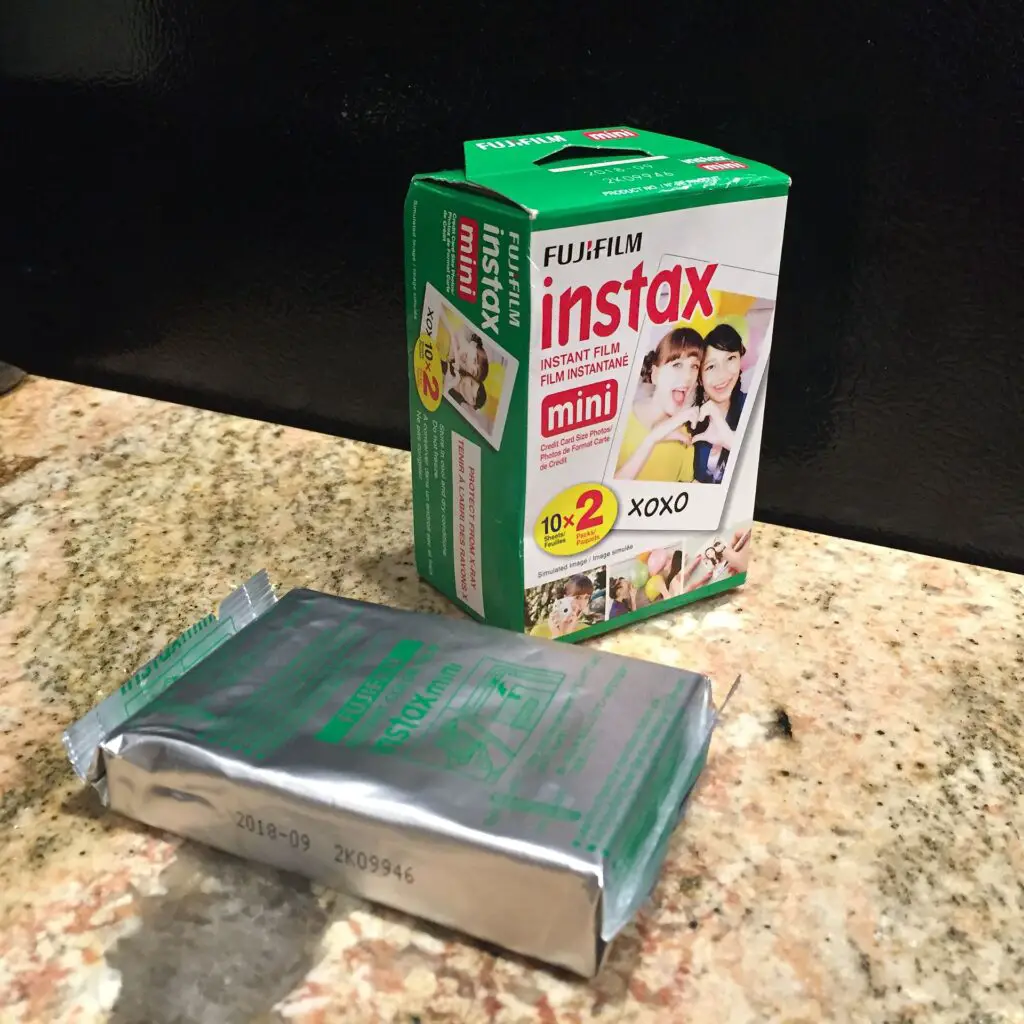
Once you have inserted a Fujifilm Instax cartridge into your camera, it will continue to be useable until the expiration date that’s printed on the foil or package the film came in. See this article for how to find the expiration date of Instax film.
Instax cameras, much like their film, doesn’t do well if stored in direct sunlight and extreme temperatures. The ideal place to store your camera and film is in a safe environment that is out of direct sunlight, high humidity, and is somewhere between the temperature range 41℉ and 104℉. Some people light to store their Instax film in a refrigerator for this reason but be sure to let the film warm back up to room temperature before using it by setting it on the counter for about an hour before use. Temperature-related defects such as blue (film is too cold) or orange tinting (film is too warm) can still occur if inside of this range. As long as you store your Instax film and camera in the right conditions, there won’t be any damage to your film.
I recommend storing your camera in your camera’s case in your closet, in a drawer, or on a low shelf out of direct sunlight without film inside.
It is best practice to shoot all the film in your camera within a few days since the film in your camera will expire 2 years after manufacture. Be sure not to open any other film cartridges except the one you intend to insert if your camera because film taken out of the foil pouch will expire quicker and is more susceptible to humidity than film stored inside of the foil pouch.
Why Didn’t My Instax Film Develop Right?
There are many reasons why your Instax film may not have developed correctly, such as:
- Damaged Film
- Dead Batteries
- Extreme Temperatures
- Opened the Film Door with film inside the camera
- Shutter Malfunction
Damaged Film
Film that was damaged film incorrect storage or just wasn’t correct from the factory can be an issue. Extreme cold, heat, physical damage, direct light, storing your film or camera in a hot car, among others will all produce physical defects and keep the film from developing correctly. These defects appear as:
- Blue tint
- Orange tint
- Overexposure or image is completely white
- Color blurs and shifting
- Bubbles
- Film cracking
- Rapid deterioration of the film
You will have to replace the damaged film with a new cartridge.
Dead Batteries
If your batteries are dead, your camera will not work since the camera flash cannot charge. It is easy to know if your batteries are dead on the camera because the camera won’t take an image or a light on the camera is quickly flashing.
To fix this issue, replace the old batteries in the camera with a fresh set of Alkaline batteries.
Opened the Film Door With Film Inside the Camera
If your photos come out completely white, you may have overexposed your film by allowing the film to see direct and bright light. This can happen in many ways, but a common example is accidentally opening the film door where you insert the film. Even if you only have the back of the camera open for a split second, it will automatically initiate the chemical development process for the film. However, this may only have affected the first three or four images since the other film is packed behind them.
Your Film is Expired
It can be hard remember when a cartridge of film expires since you can’t open the film door after taking the first picture, but you’ll know your film is expired if your pictures have
- Less sensitive to light / looks overall darker
- The colors are shifting
- decrease in contrast and look overall faded
To fix this issue, you’ll need to replace the old film with new film.
Shutter Malfunction
A shutter malfunction happens when the camera shutter ,that lets light for fractions of a second, into the camera to expose the film isn’t operating correctly. This could cause images that are completely dark since the images aren’t getting any light through the camera. If your camera does this intermittently, then it is a good indication that this is your problem.
You may be able to fix this issue by resetting your camera by removing the batteries in your camera with the camera turned on (the lens is extended) and reinstalling them. However, if this doesn’t fix the issue you may need to send in your Instax camera for repair by visiting this website.
Should I Open Instax Film in the Dark?
There’s no need for you to open a new cartridge of film from its foil pouch in the dark. Each Instax film cartridge has a black paper slide as the first sheet to protect film in the pack from exposure to light. However, it is best practice to not load the film into the camera in direct sunlight.
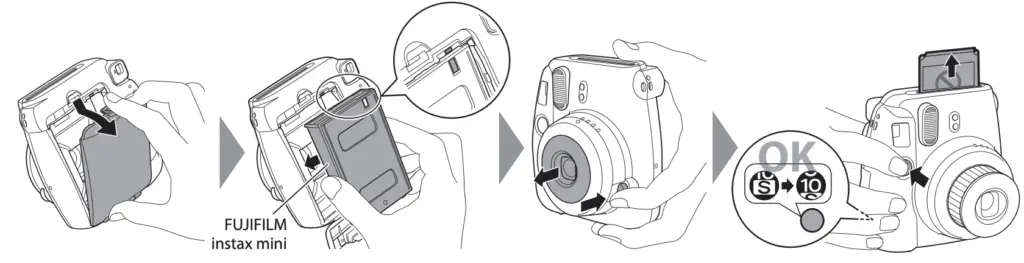
After you insert the new film cartridge into your Instax camera and turn on the camera, this black paper is automatically ejected, the “S” in the film counter window goes to “10”, and your camera is ready for the first picture.
Tips For Best Results With Instax Film
Best to Use Bright, Natural Light
Natural light is softer and allows shadows to be cast so that the image is more natural. However, natural light tends to result in underdeveloped photos which tends to make photographers use the flash, but the flash lacks depth and makes everything pale. Finding strong natural light for your photo will prevent the image from being unnatural or underdeveloped.
Stand Between 1 – 8.8 ft (0.3 – 2.7m) From Your Subject
If you’re using the flash on your camera and try taking a picture while too close or too far away from your subject, the flash won’t be effective, and in darker lighting, details in your image won’t be bright enough to see. Make sure to stand between 1 – 8.8 ft (0.3 – 2.7m) from your subject when taking an image for best results using a flash on your camera.
Experiment With Your Brightness Settings
The best way to ensure your photos develop well is to get to know your camera’s settings and the best situations to use them. For example, some Instax cameras, like the Instax Mini 8, and Mini 9, and Instax Wide have adjustable exposures settings. Experimenting with your camera may waste film but it will help you find the best exposure settings and once you become more familiar with your camera, and in the future, you will get more consistently good images.
Conclusion
The most complicated part about using Instax camera is troubleshooting the problem if your pictures don’t turn out the right way. Hopefully, this article helped you to determine possible causes for your camera trouble and help you to know what to avoid or how to fix your problem.