In the world of photography, there are many different types of cameras to choose from. However, one type that was quickly growing in popularity was the Instax Mini 8 camera so you may have one or gotten one as a gift.
To use the Instax Mini 8, first load batteries and film into your camera, turn the camera on by pressing the narrow button next to the lens, point the camera at your subject using the viewfinder, select the correct exposure using the orange indicator lamp on the lens and rotating it to the appropriate exposure setting, and press the shutter on the front of the camera to take a picture.
As you can see, the Instax Mini 8 can take photos in just a few seconds by pressing a button on the front of the camera. Of course, there are more details to know, like how to load film into the Instax Mini 8 or what film the Instax Mini 8 uses, and we’ll go through all of them in this complete guide below.
How to Set Up Instax Mini 8 For The First Time
1. Load The Batteries
The Instax Mini 8 uses two alkaline AA batteries, which can easily be purchased at most stores or online. Start by loading the batteries into your camera and opening the battery lid near the lens and on the side. Once the batteries are loaded, the next step is to insert the film into the camera.


NOTE: The Instax Mini 8 camera is designed to be used with Alkaline batteries so other kinds of batteries might give less than desirable results and might even cause the orange light to blink (I have used rechargable batteries without issues but they tend to decline quicker than Alkaline).
Another thing to be mindful of is batteries may corrode the Mini 8’s interior if left inside the camera for long periods of time, so you’re better off removing them when not using the camera for weeks or months.
2. Load The Instax Mini Film into the Instax Mini 8


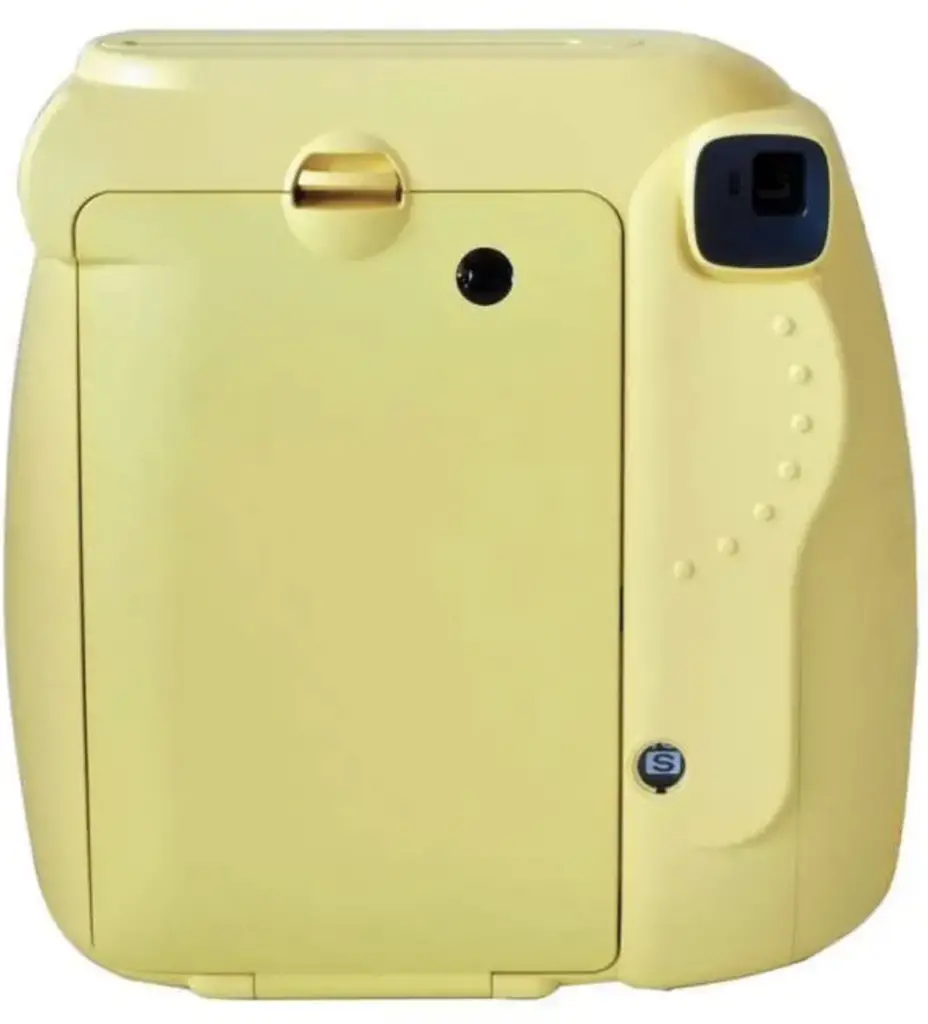
Before you begin, make sure there is film in your Instax Mini 8 by checking the film counter window on the back of the camera. If this is the first time you are setting up your Instax Mini 8, the film counter window should show an “0” and means there is not film in the camera.
- If there isn’t any film in the camera, open the film pack cover at the back of the camera.
- Open the film package, unwrap it, and place it in the Instax Mini 8. The film side must be inserted face down. Note the yellow mark on both the camera and the cartridge. Both must be aligned when inserting the film. Only touch the sides of the film pack when loading the film into the camera or you you damage the film inside the film pack
- Close the film door on the back of the camera
You’ll notice a small window at the back of the Instax on the film door near the viewfinder. When it displays a yellow stripe, it means that your film is loaded correctly – otherwise it will be just dark if the camera has no film or no yellow will be present.
Instax cameras don’t come in the box with a film cartridge inserted in the camera, so if that’s your first time setting up the Instax Mini 8 the window on the film door will be empty .
.
3. Turning On The Camera
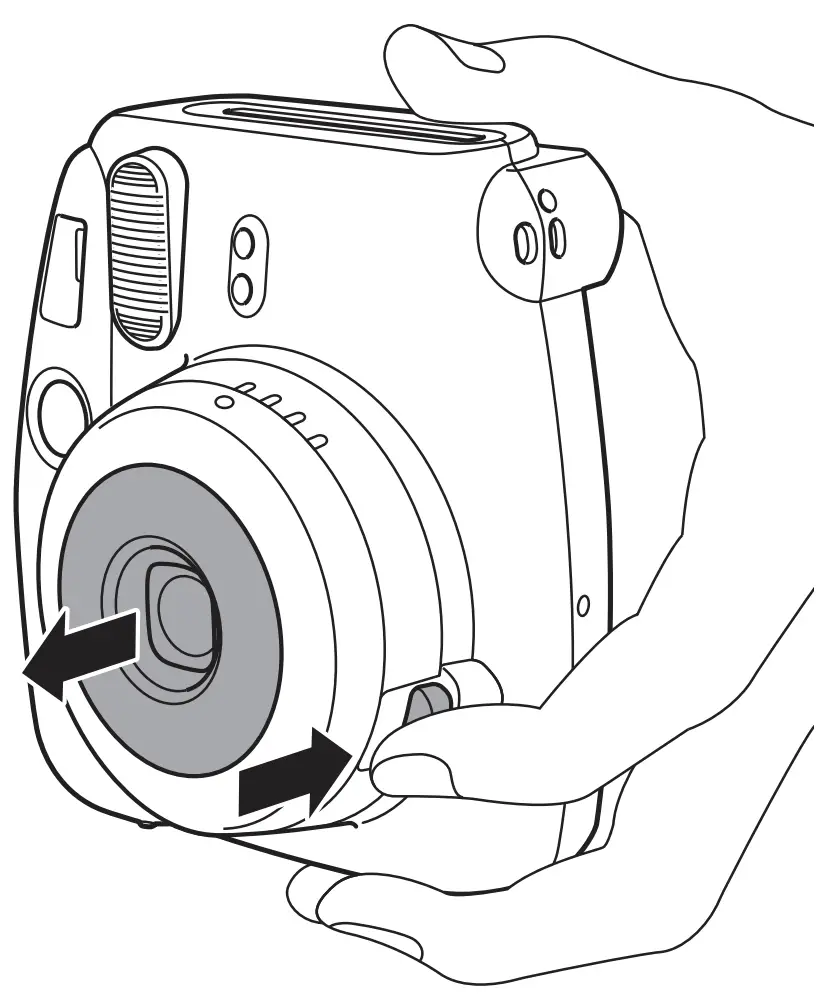

With the batteries and film loaded, the next step is to turn on the camera by pressing the narrow power located near the lens.
When the camera is turned on, the lens will fully extend and you will hear a small whine of the flash charging. You will also see that the flash charging light next to the viewfinder on the back of the camera will flash. When the flash charging light is not flashing anymore and solid the camera is ready to take a picture.
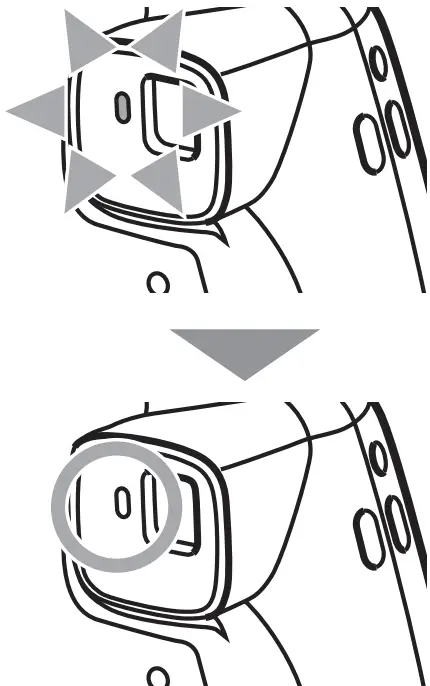
(NOTE: the camera will not take an image until the flash has charged and ready so make sure you use fresh alkaline batteries).
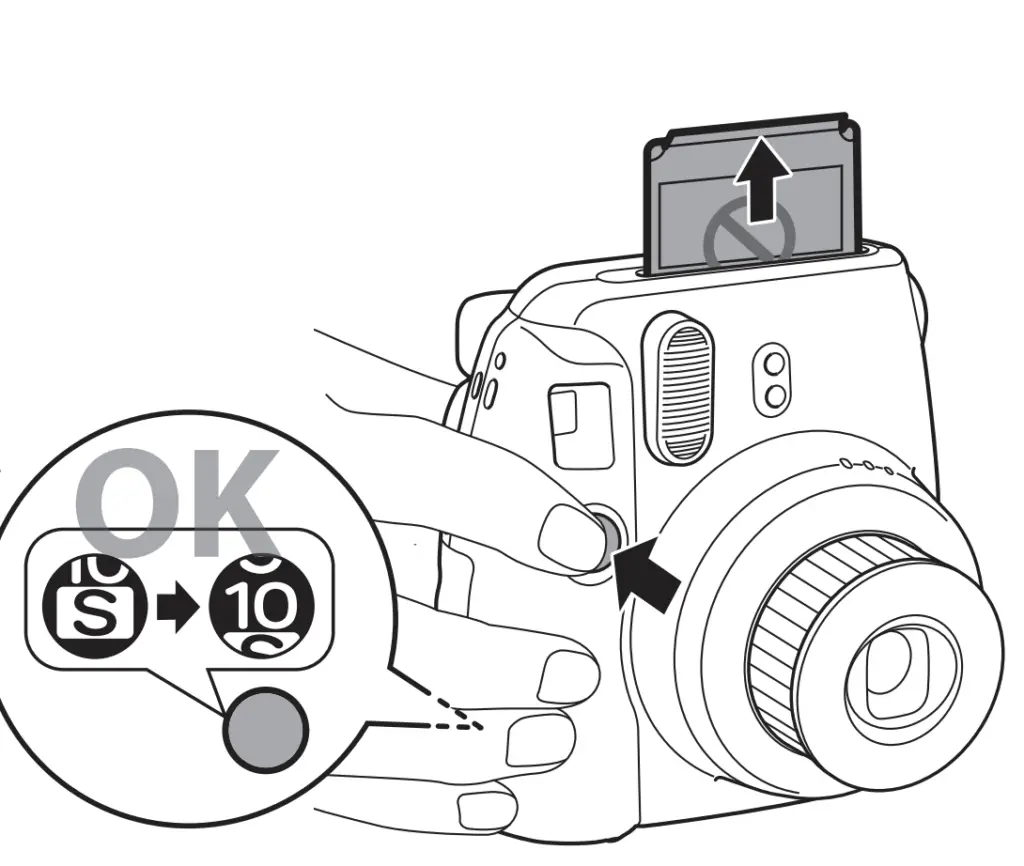
Once the film is loaded correctly in the camera and the camera is turned on for the first time (or with a new cartridge of film) the film counter on the back of the camera will say “S”“. This means there is film inside the camera but you need to eject the darkslide. The darkslide is used to protect the film from light when loading the film cartridge into the camera. To eject the darkslide from the camera, press the shutter button and the film counter will show a “10” and now you are ready to take images.
4. Adjust the Exposure
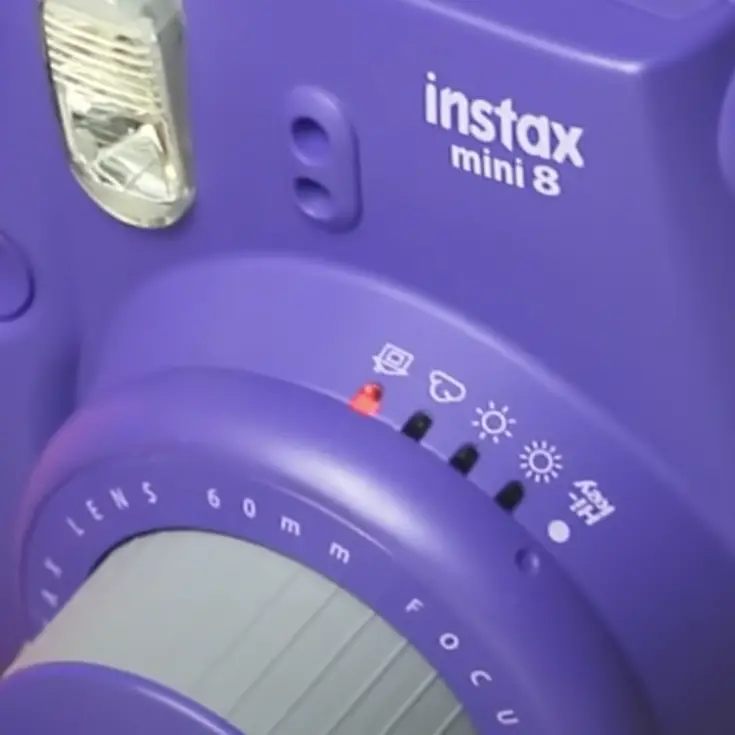
The exposure settings on the Instax Mini 8 are semi-manual, which means the camera indicates the correct exposure setting but that you must physically switch between the different modes. The Instax Mini 8 will indicate which exposure mode is best for the current situation using an orange light but you have to manually change move the dial so the small dot on the lens aligns with the orange light.
However, you don’t have to choose the setting the camera suggests, which makes the Instax Mini 9 different from the Instax Mini 11 .
.
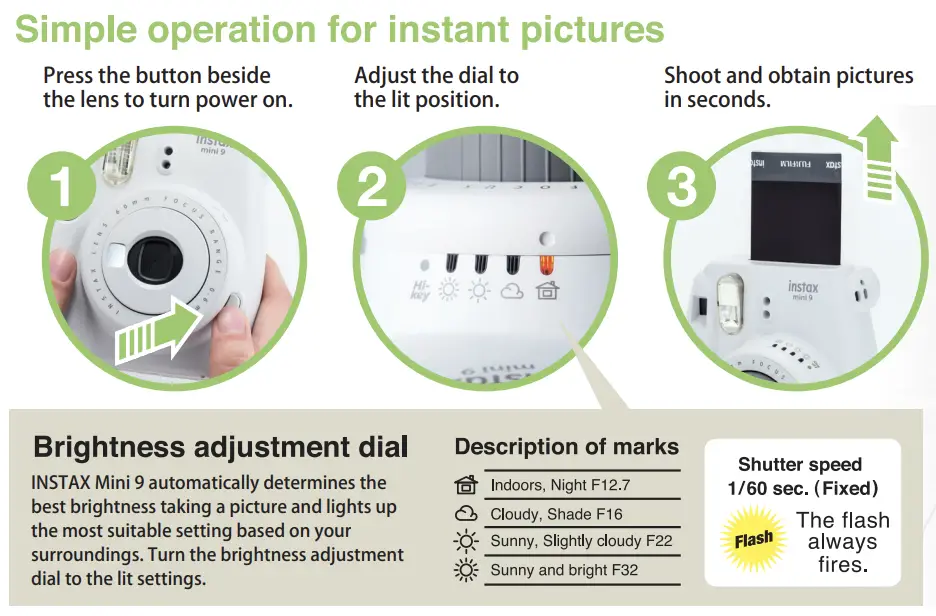

The five exposure settings on the Instax Mini 8 that are suggested by an orange light on the camera and are:
- The house (used as default) – for indoor and low-light situations
- The cloud – Used for outdoor takes on a cloudy day
- The sun – Used for outdoor takes on a sunny day
- The strong sun – Perfect for very bright situations
- Hi-Key – Ideal for low-light photography and for portraits (only one not indicated by an orange light)
Read this article for more information about how and when to use the Hi Key mode on the Instax Mini 8.
5. Shooting Photos
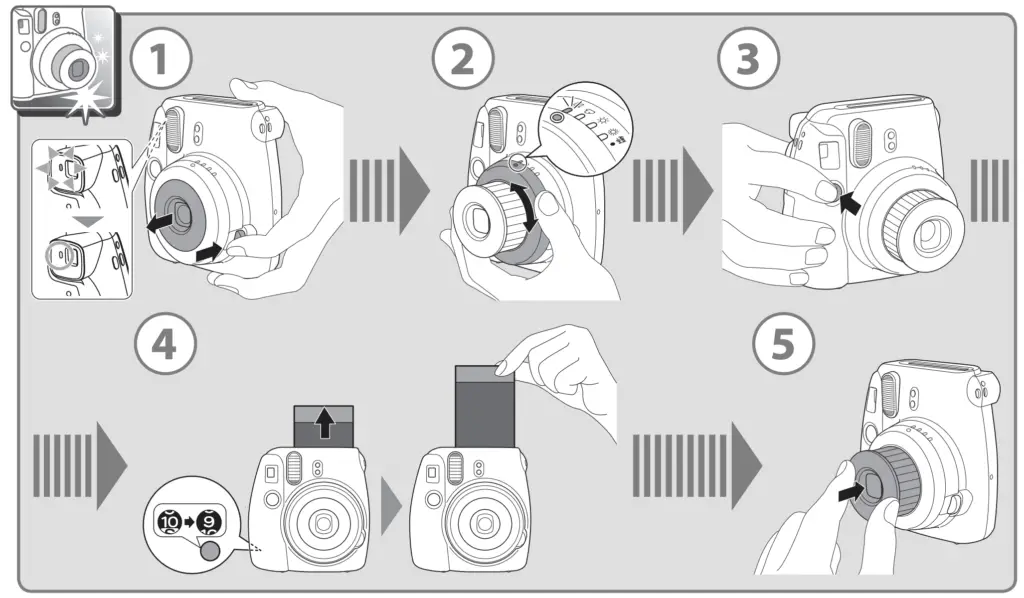

To take good pictures with the Instax Mini 8, follow these steps.
- Press the shutter button located below the viewfinder on the front of the camera to take an image
- The film will eject from the camera and the film counter window will go down by one. Wait until the film has fully ejected before pulling it the rest of the way out of the camera. The film will fully developing around 90 seconds (keep the film facedown in direct sun for optimum results
- To turn off the camera after taking an image, press the extended lens back into the camera until it clicks.
What Film Does the Instax Mini 8 Use?
The Instax Mini 8, like the Instax Mini 9 , can only use the Instax Mini Instant film
 . Instax Mini film is the smallest of the Instax instant film made by Fujifilm at 3.33 x 2.13 inches. Instax mini film is the cheapest Instax film available at around $.95 USD per sheet (find the Mini film here on amazon.com) but sometimes can be found for less. The most popular versions of Instax Mini film are color and black & white film but there are many other versions of Instax Mini film on the market.
Tips After Setting Up Your Instax Mini 8
For tips on taking good images using the Instax Mini 8 instant camera see this guide but here are few for you to read in this article that are helpful.
Don’t Open The Back Cover in Direct Sunlight
When loading your film in Instax Mini 8, don’t load your film in direct sunlight because it can ruin your film and give them light leak marks and/or make your photos completely white and unusable. Instead, load your film in a low-light environment such as at home in a bathroom with most of the lights off or in the shade if you are outside such as under a tree or under a jacket or shirt.
However, you never want to open the film compartment door once there is film in camera and the dark paper has been ejected. This will exposure the film to light and most of your film will be unusable.
After film is ejected from the camera when taking an image, develop an Instax photo properly by turning it over and covering it with your hand or a shirt to stop direct light from damaging the image on your film. Touching the film or shaking it after it’s ejected could damage it as well.
The Maximum Flash Range of the Instax Mini 8

With the Instax Mini 11, be sure to remember that its flash range is 1.9 – 8.8ft (0.6m – 2.7 m). This means that if the camera is farther than 8.8 ft (2.7m) away from the subject the image will come out dark and you may not see your subject. The flash’s recycle time varies from 0.2 to 6 seconds depending on the batteries. Since the shutter speed on the Instax Mini 8 is fixed at 1/60 seconds, only objects or people near the camera will be lit when taking a picture at night or in low light situations.
Don’t Cover the Sensors of Your Instax Mini 8
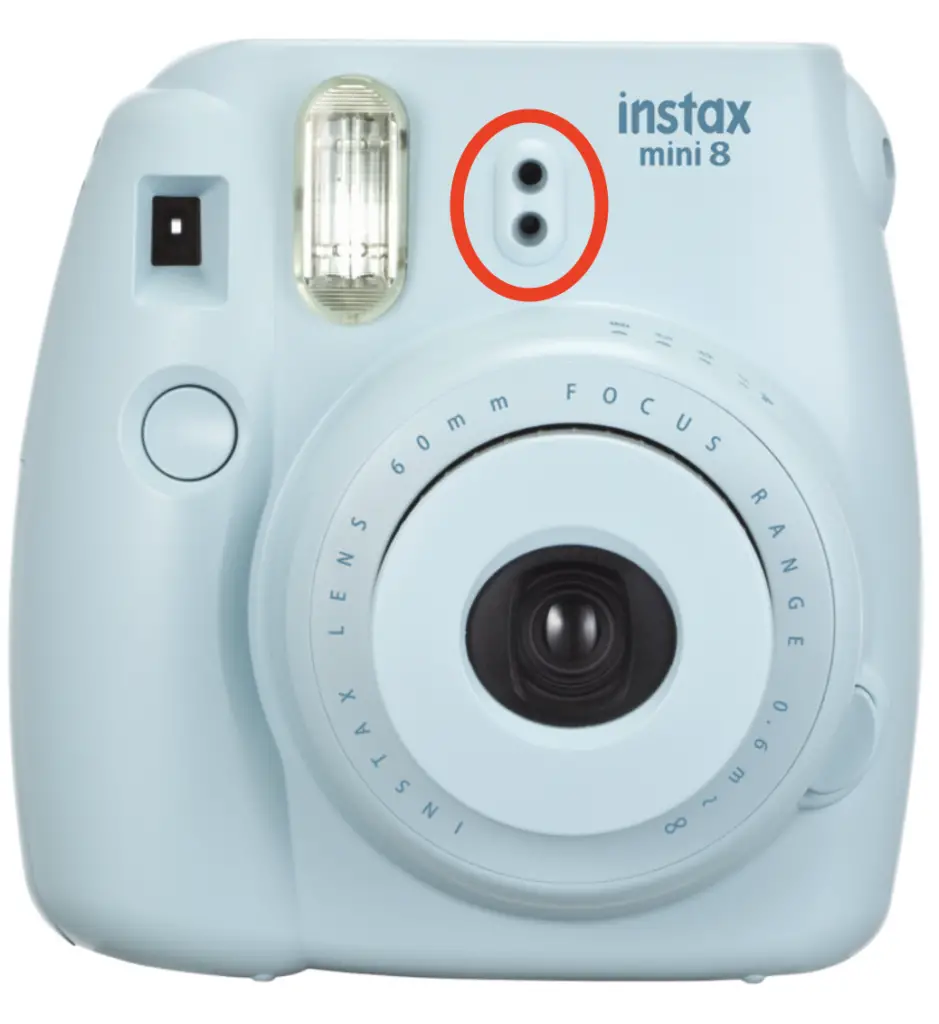
Don’t cover the small holes on the front of the Instax Mini 8 when taking an image. These are light sensors that help the camera calculate how the exposure and flash power when taking and image. Covering them will cause the camera not to understand the lighting in the environment and could result in an overexposed or completely white image.
Instax Mini 8 Frequently Asked Questions
When Was Instax Mini 8 Released?
The Fujifilm Instax Mini 8 camera was released in November 2012 and has been a popular instant camera since the beginning. The camera is simple to use Instant camera that uses Fujifilm Instax Mini film, which is the least expensive instant film . The Instax Mini 8 has a built-in flash and an automatic exposure control that you can control, similar to the Instax Mini 9
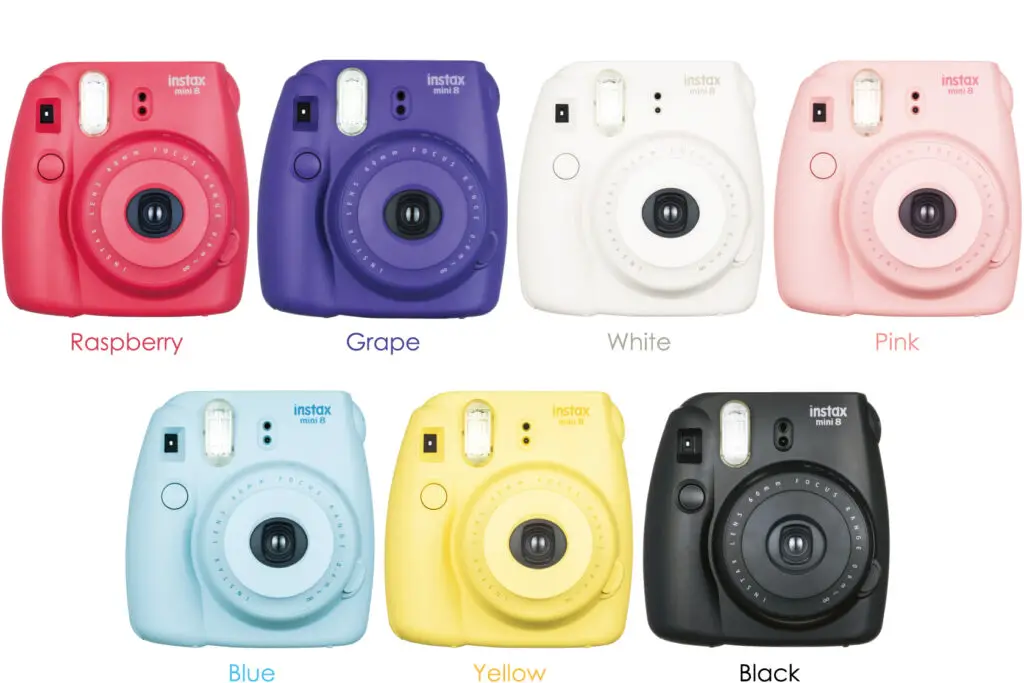
 . The camera is available in several different colors: Raspberry, Grape Purple, White, Pink, Blue, Yellow, Black, among others.
How Do You Turn On A Polaroid Instax Mini 8 Camera?
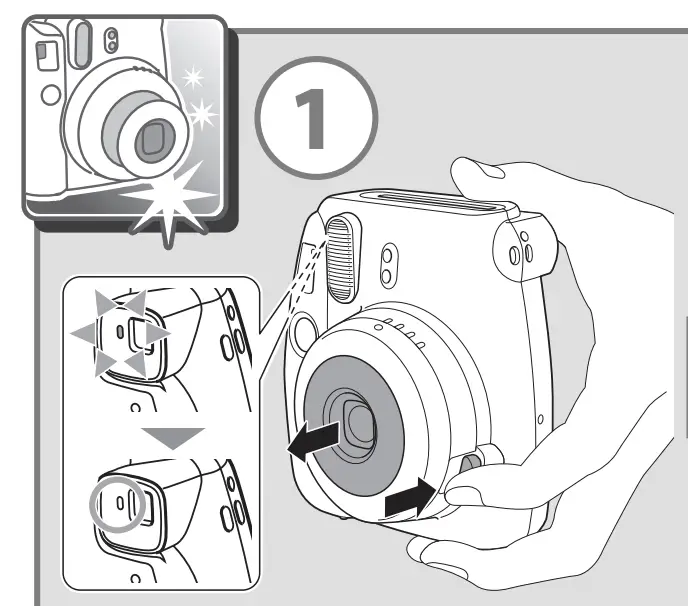
To turn on the Instax Mini 8, press the narrow button next to the camera lens. The lens will extend and, if there are batteries in the camera, the flash indicator light next to the viewfinder on the back of the camera will slowly flash. Once it is lit the flash is ready to shoot. Keep in mind that you won’t be able to take an image until the flash is completely charged.
What Batteries Does The Instax Mini 8 Use?


The Instax Mini 8 uses two alkaline AA batteries. The batteries are inserted into the battery compartment on the side of the camera. Be sure to remove the protective cover before inserting the batteries. Keep in mind that the camera’s flash won’t charge unless the batteries are correctly installed and the camera won’t take images until the camera flash is charged.
If the red light next to the viewfinder on the back of the camera lights, then you may need to install fresh batteries or use alkaline batteries. Fujifilm recommends using alkaline batteries so other types may not give you this error message (although I haven’t had any problems with rechargeable batteries).
How To Load Film in the Instax Mini 8?


To load film into the Instax Mini 8, open the back of the camera and pull out the cartridge holder to remove old film from the camera. Load a new film cartridge into the holder, making sure that the yellow tab is facing up and that you are only touching the sides of the film pack. Touching the back where the film is will result in less than desirable results from your images. Now you need to close the film compartment door.
Once you’ve loaded the film into the camera and before you can take images, you will need to turn on the camera and eject the dark paper that protects the film pack from light when loading into the camera by pressing the shutter button. When doing this the “S” in the film counter window on the back of the camera will turn to “10”.
You’re now ready to take photos!
What Film For Instax Mini 8?
The Instax Mini 8 can only use the Instax Mini Instant film . Instax Mini film is the smallest of the Instax instant film made by Fujifilm at 3.33 x 2.13 inches. Instax mini film is the cheapest Instax film available at around $.95 USD per sheet (find the Mini film here on amazon.com) but sometimes can be found for less. The most popular versions of Instax Mini film are color and black & white film but there are many other versions of Instax Mini film on the market including:
- Sky Blue Instax Mini film – color film with a light, pastel blue frame
- Monochrome Instax Mini film – black & white film with a white border
- Contact Sheet Instax Mini film – color film with a black border and small, orange text so it looks like a contact sheet of film
- Rainbow Instax Mini film – color film with right colors on the frame borders
- Blue Marble Instax Mini film – color film with a marble frame with blue touches
- Hello Kitty Instax Mini film – color film with Hello Kitty drawings on the borders
Naturally, there are more available depending on your area, and if you’re traveling abroad, you may be able to find limited editions in other countries.
How Do You Take The Film Out Of An Instax Mini 8?
Once you’ve used all the film in your camera and the film counter is on “0”, you’ll want to remove the old film pack. To remove the film pack, first open the film compartment door. Then, pull out the used film pack with your thumb and first finger using the notches on the back of the film pack and pull it straight out of the camera.
It’s worth noting that if you’re willing to remove the cartridge from the camera and you still have some film in it, you will want to do it in the dark. In fact, Fujifilm film is light-sensitive, and only a few seconds outside could ruin the front image in your cartridge.
Instax Mini 8 vs Instax Mini 8+?
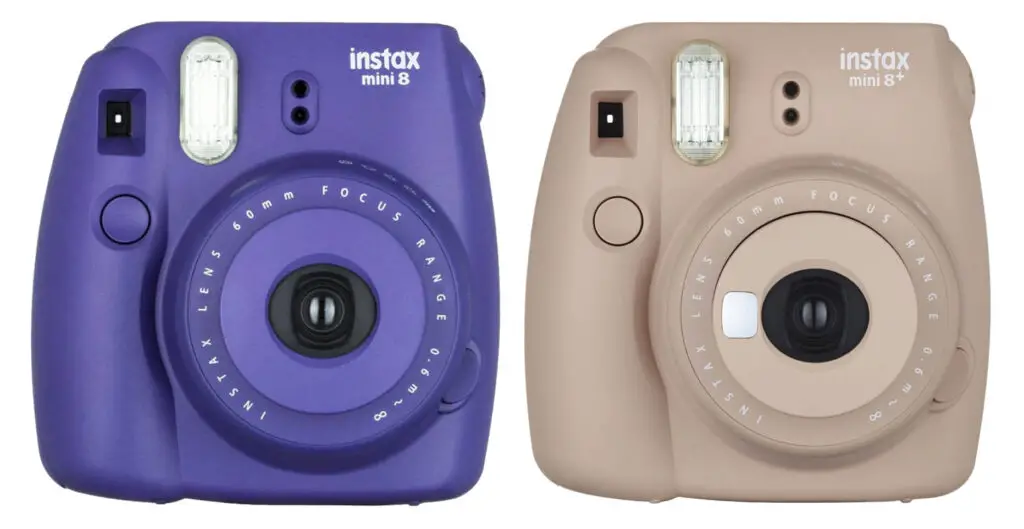
You may be wondering what is the difference between the Instax Mini 8 and the Instax Mini 8+. The Instax Mini 8+ is almost exactly the same as the Instax Mini 8 but it has a built-in selfie mirror and comes with a close-up attachment that changes the minimum focusing distance of the camera from 23 inches (0.6m) to 15.7 inches (40 cm).
If you have the Instax Mini 8 and are looking to buy the Instax Mini 8+, then I recommend just buying the Instax Mini 9 (which is basically the same camera as the Instax Mini 8+). However, you can also save money by just buying a close-up focusing and selfie-mirror attachment which will change the mimium focusing distance to 15.7 inches – 23 inches (40 – 60 cm) from the 23 inches (0.6m) on your Instax Mini 8 and will save you some money.
How To Turn Off Flash Instax Mini 8?
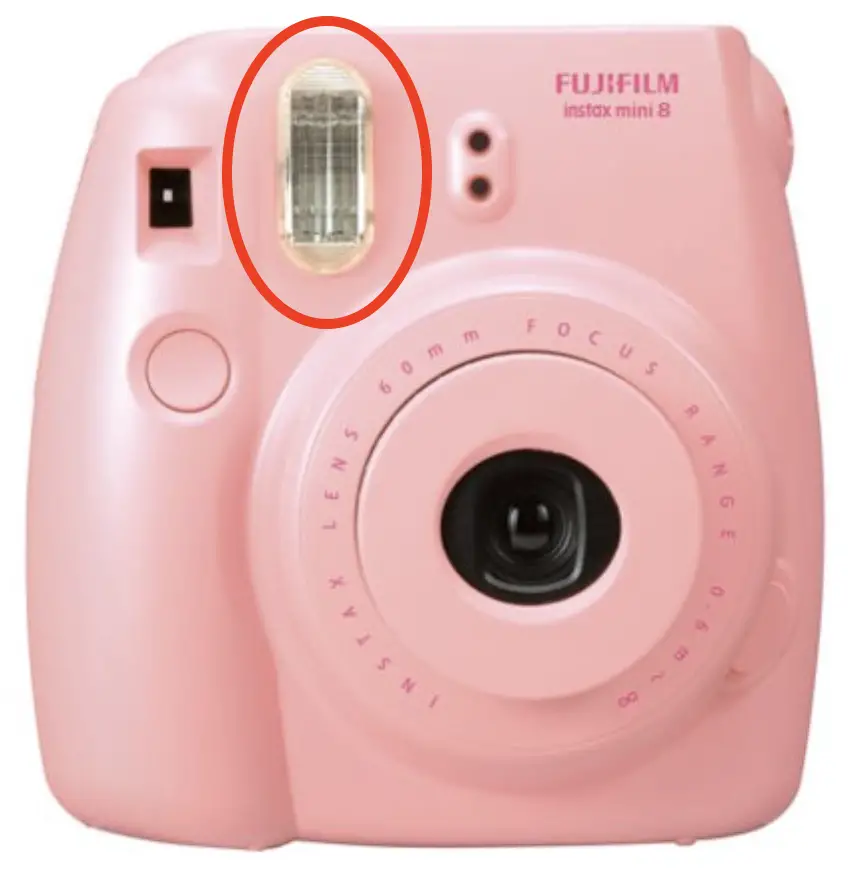
Just like other Fujifilm cameras such as the Instax Mini 9 and the Instax Mini 11, the flash on the Instax Mini 8 cannot be turned off. However, the camera has different brightness settings, allowing you to have more control over your shots and, therefore, capture the perfect photo.

What Are The Instax Mini 8 Settings?
Like the Instax Mini 9 , exposure settings on the Instax Mini 8 are semi-manual, which means the camera indicates the correct exposure setting but that you must physically switch between the different modes. The Instax Mini 8 will indicate which exposure mode is best for the current situation using an orange light but you have to manually change move the dial so the small dot on the lens aligns with the orange light. However, you don’t have to use the setting the camera suggests, which makes the Instax Mini 8 different from the Instax Mini 11
 .
.


The five exposure settings on the Instax Mini 8 that are suggested by an orange light on the camera and are:
- The house (used as default) – for indoor and low-light situations
- The cloud – Used for outdoor takes on a cloudy day
- The sun – Used for outdoor takes on a sunny day
- The strong sun – Perfect for very bright situations
- Hi-Key – Ideal for low-light photography and for portraits (only one that is not indicated by an orange light)
Read this article for more information about how and when to use the Hi Key mode on the Instax Mini 8.
Conclusion
In conclusion, despite having been discontinued, the Fujifilm Instax Mini 8 is a great camera for anyone looking for a quick and easy way to take instant photos. It’s perfect for parties, family gatherings, and other special occasions. Although, you aren’t able to turn off the flash on the camera you have more control over the exposure than the Instax Mini 11, which still makes the camera popular.
Plus, it is very easy use, so you don’t need to be a photography expert to get great results. So, if you’re looking for a fun and affordable way to capture memories, the Fujifilm Instax Mini 8 is definitely worth considering.

