
In the recent decade, film photography is starting to become popular again despite the conveniences of digital cameras are common place. If you are unfamiliar with the photographic process some question you may have is why do photographers need darkroom and do they still use them?
Photographers still need a darkroom because it allows them to handle light-sensitive darkroom paper to produce traditional prints from developed film negatives. Even though it is a commonly held belief, you do not need to use a darkroom to develop film.
Now you know why photographers need a darkroom and that photographers still need to use them, let’s dive into more questions about darkrooms that you may have may have such as who invented the darkroom and how dark does a darkroom need to be?
What is a darkroom?
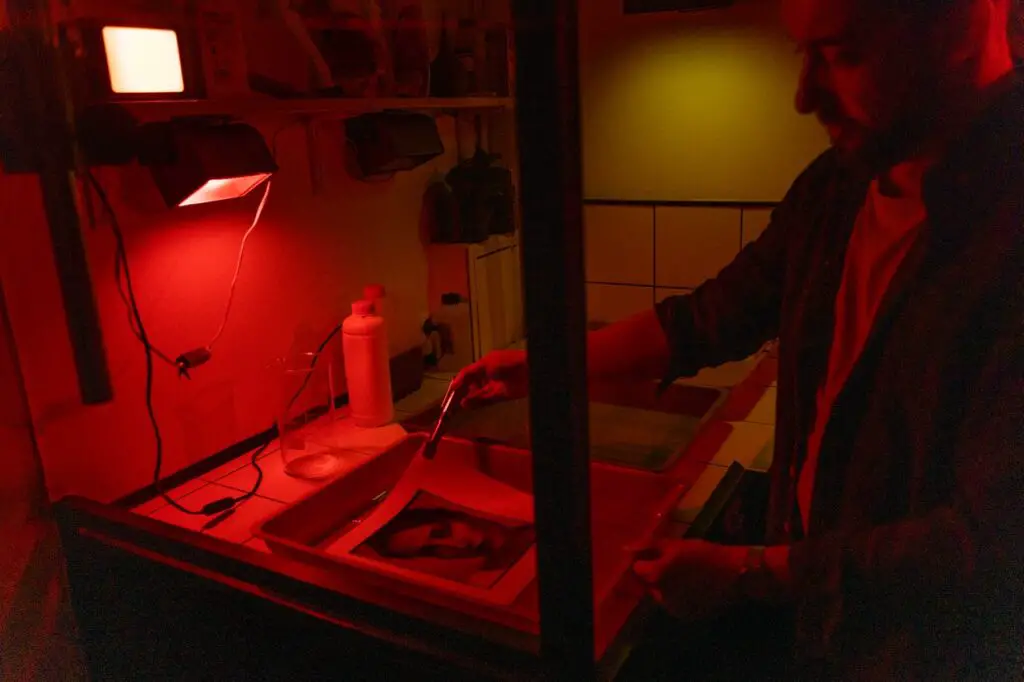
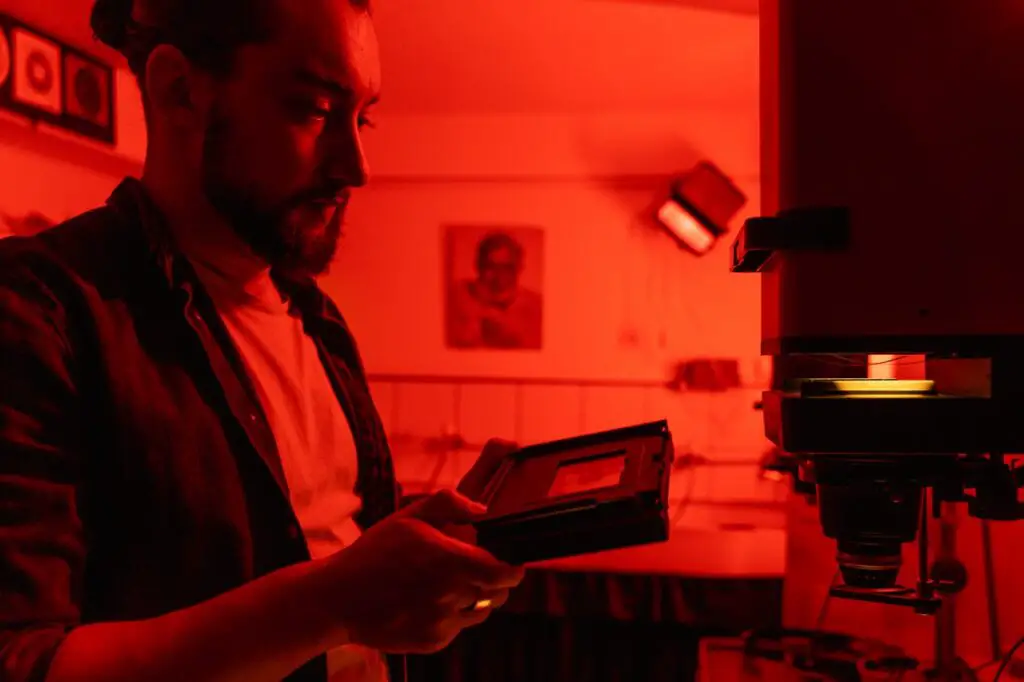
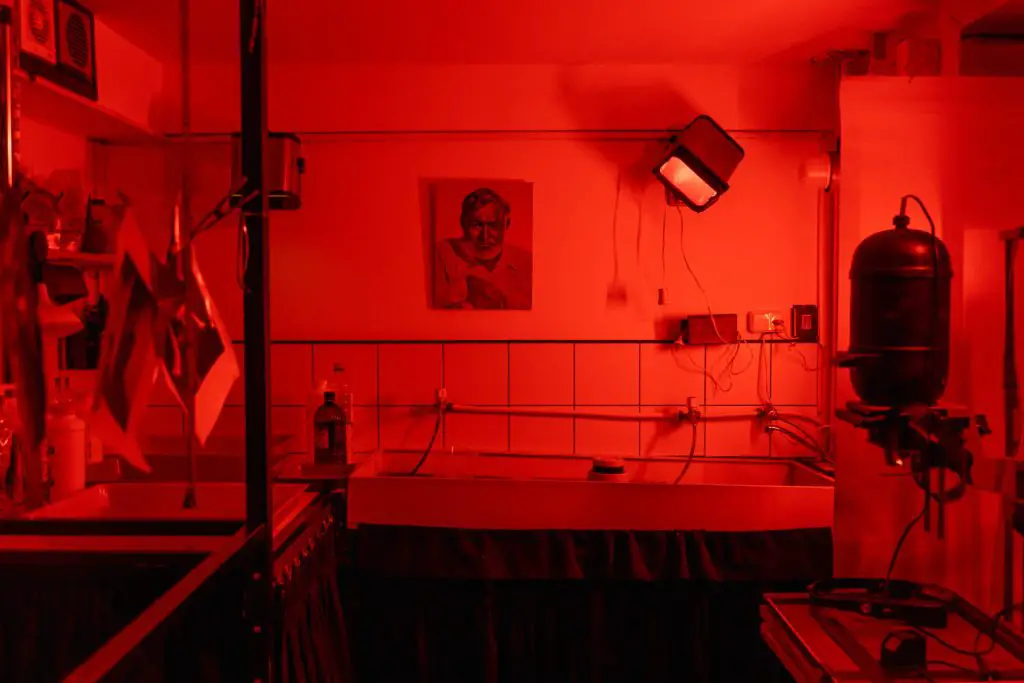
You may have seen scenes in movies or on TV show like Stranger Things showing photographers working in room with a red light and surrounded by photos. The room is called a darkroom and is used with film negatives to produce traditional darkroom prints and has two sides: the dry side where the paper is exposed to light projected through a film negative, and a wet side where the paper is developed. The print is created in the darkroom by projecting light through film negatives using a negative enlarger onto special darkroom paper that contains light-sensitive chemicals.
Before you can see the image, the paper needs to processed by running it through 3 specific chemicals: developer, stop-bath, and fixer chemicals in addition to washing the film in water before drying. Film and paper processing chemicals are so similar that you can use the same stop-bath and fixer chemicals for both black & white film and paper. However, be aware that film and paper developing chemicals are different and not interchangeable.
Since black & white darkroom paper is sensitive to all colors of light except for red and amber, lights that produce these colors, called safelights, are used to control light so the photographer doesn’t have to make a black & white print from a developed photographic negatives in complete darkness. However, the opposite is true for color darkroom paper. While darkrooms are used to make prints from photographic negatives, it isn’t necessary to develop film in a darkroom.
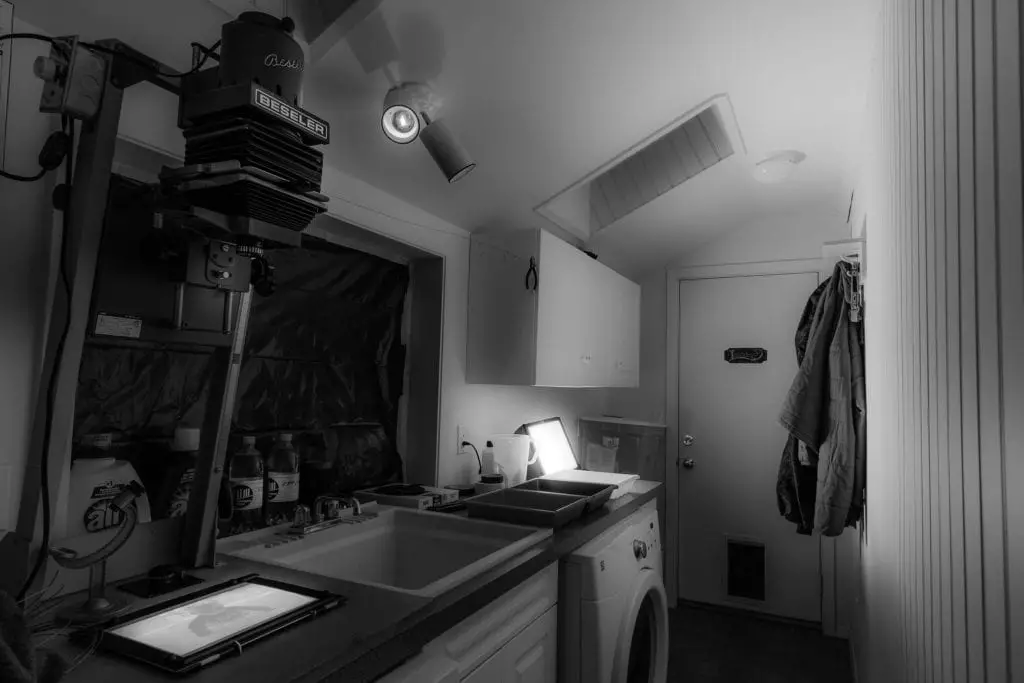
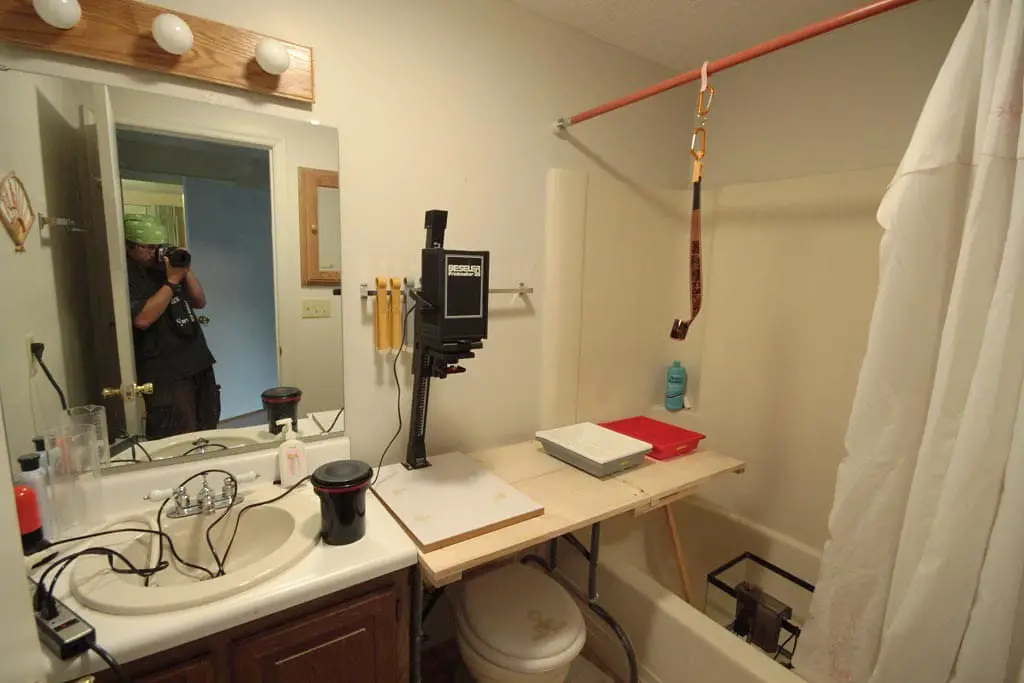
A darkroom can set up anywhere like a basement, garage, laundry room, or even a bathroom. All is needs to be is completely dark and enough room to be able to move around and to be set up in two sections: a dry side and wet side. The dry side of the darkroom includes the paper easel and enlarger that focuses the film negative and controls how much light is projected through the negative onto the darkroom paper. The wet side of the darkroom is where the exposed darkroom paper is washed through the development chemicals to develop the latent image on the paper produced by the enlarger and film negative.
While a color and black & white darkroom needs to both be completely dark, you need to be aware there are a few differences between a color and black & white darkroom to be aware of:
- To make color prints you will need a color enlarger with a color pack
- You can make black & white prints with a color enlarger but, in general, you cannot make color prints with a black & white enlarger
- Color paper development requires a couple different chemicals than black & white paper
- Black & white paper is available in fundamental different paper types: RC and Fiber based paper and these paper require different drying times and are washed differently. Color paper is only available in RC paper.
- While black & white paper can be handled in a darkroom using a red or amber safelight, color paper should be handled in complete darkness since it sensitive to all colors of light (there is a color paper safelight but in my opinion, not worth it).
- Black & white darkroom chemicals last longer in storage once mixed than color chemicals
- Color chemicals are more susceptible to temperature variations with the processing chemicals than black & white chemicals
Why is it Called the Darkroom?
Darkrooms are called darkrooms because it is a almost completely dark room used to make photographic prints using light-sensitive paper from film negatives. The room needs to be completely dark because photographic materials used in the darkroom, like darkroom paper, is sensitive to all light except for light that is emitted from a red or amber “safe light”. This safelight allows for you to see where you are going in the darkroom while you handle the light-sensitive materials used in making traditional black & white darkroom prints.
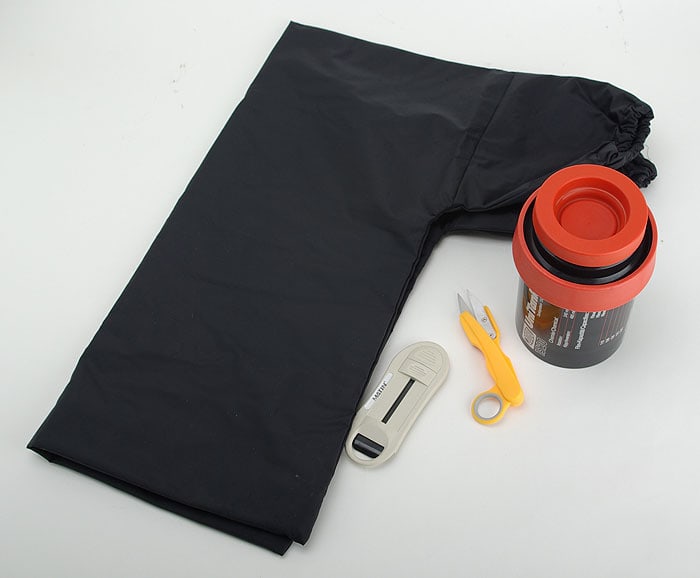
One thing to note is that you do not need a darkroom to develop film, just a room that is entirely empty of light or a light-tight film changing bag to load the film into the developing tank. Once the film is loaded into the developing tank properly, than the lights can be turned back on and you can develop your film in normal light.
When Was the Darkroom Invented?
Darkroom have always been around since the beginning of photography since processes uses light sensitive materials for it to work. The darkroom is where film would be developed or film negative would be used to make a photographic print.
The first person to use the term “dark room” was Leonardo Da Vinci who wrote about the Camera Obscura (latin for “Dark Chamber”), a device that helped him with drawing, in the 14th century. The device was a darkened room with a small hole through a wall that light would travel through to the opposite wall on the other side of the room, which an image of the outside would be projected.

It wasn’t until the early 19th century, that the French artist and photographer, Louis Daguerre, alongside Nicéphore Niépce, invented the photographic process called the daguerreotype that the darkroom became synonymous with photography. The daguerreotype process heavily relied upon a darkroom to develop the one-of-a-kind resulting image. Other photographic processes where invented, such as the calotype by Englishman Henry Fox Talbot, that also relied upon using a dark room to process the negative or make a print from the resulting photographic negative. The darkroom progressed to become a darkroom, tent, or stagecoach to develop glass negatives used to make prints in the mid-19th century and especially during the Civil War with war photographers like Matthew Brady, Roger Fenton, Alexander Gardner, and Timothy O’Sullivan.
![Timothy O'Sullivan. Photographed 1862, [printed between 1880 and 1889] Photograph shows a portable photographer's darkroom on wheels and possibly Timothy O'Sullivan standing next to it. (Source: Stereograph of similar image at the New York Historical Society). Brady's portable darkrooms were nicknamed "Whattizit" by the troops. (Source: Field, Ron. Silent Witness, 2017, page 173)](https://thephotographyprofessor.com/wp-content/uploads/2022/06/service-pnp-ppmsca-32800-32800v.jpg)
The late 19th century saw the rise of the popularity of portrait photography and the tintype so darkrooms became mostly used in a photographic studios by portrait photographers. The early 20th century was the birth of plastic-based film and the personal film camera because of inventor George Eastman, who started the Kodak company that would develop the film from their camera and send back the prints for the customer, as the precursor to the disposable camera. However, darkrooms were still the norm up until the mid 20th century.
With the advent of Polaroid instant film in the 1970’s, digital cameras in the 1990’s, and digital cameras becoming more and more available through smartphones (like the iPhone that was introduced in 2007) photographic darkrooms are not as commonplace as they once were. Currently, you will mostly find darkrooms at colleges and universities, schools, community art centers, and professional photographer’s studios that specialize in film-based photography but more and more you are starting to find people becoming interested in film-based photography and that want to build personal darkrooms in their garage or bathroom to be able to make their own traditional darkroom prints. However, you can also find creative ways to create darkrooms such as a camper van or a bicycle.
Why do we Need to Develop Film in a Darkroom?
Both color and black & white film is sensitive to all light so film should to processed in complete darkness using a film developing tank and chemicals before you can see the images. However, this processes does not necessarily need to be done in a traditional photographic darkroom – just a room devoid of light.
The film developing process is usually done by loading the film into a light-tight canister that is specially made to develop film, called a film developing tank. However, this process doesn’t need to happen in a photographic darkroom similarly to making a traditional photographic print, just a room that is completely dark or using light-tight film changing bag. Even a small amount of light can ruin film during the process of loading into the film developing tank to be developed. However, once the film is fully processed, or “fixed”, it can be taken out of the developing tank, exposed to light, and the film won’t be affected.
To get pictures from camera film, the film must be cut into separate pieces, called negatives. The negatives are then used to project the photographic image stored on them onto special photographic paper.
Photographic paper reacts to light to produce the image taken by a camera and stored on film. Since photographic paper reacts to light, pictures using camera film need to be produced (a process called developing) in a room that is completely dark.
Why Does a Darkroom Have to Be Dark?
Darkrooms need to be dark because photographic materials like darkroom paper are sensitive to light. However, some darkroom materials used in certain processes, like black & white photography, are not sensitive to the entire light spectrum so you can use a red or amber color light (called a safelight) that darkroom paper doesn’t “see” in order to work in the darkroom to make prints from negatives. Controlling the light using this safelight in the darkroom is essential to exposing the darkroom paper correctly to get the image that you want when making a print.
How Dark Does A Darkroom Need to Be?
How dark your darkroom needs to be depends on what kind of print you are making in the darkroom. If you are producing a color print then the darkroom needs to be completely dark because color film and paper are sensitive to all wavelengths of light in the color spectrum. However, if you are making a black & white print in the darkroom, the darkroom doesn’t have to be completely dark and you can use a red or amber-yellow safelight to light the room while you work.
In any case the room needs to be devoid of any other light for it to work properly. There are 2 ways to check if the your darkroom is dark enough:
1. Sit in the Room for 10-15 mins To Check for Stray Light
One way to check if your darkroom is dark enough is to sit or stand in your room for 10 – 15 minutes. After that period of time you will be able to see any stray light entering your room. You can also place a white sheet of paper in front of you. If you can see the white paper then there is too much light and you will ruin / fog your paper.
If there is any light coming in that I recommend using thick black tape (like gaffer’s tape) around doors and windows to block any light entering the room. Repeat the test as much as needed to make the room light-tight.
2. Use Darkroom Paper to Check for Darkness
Another way to test your darkroom is dark enough for making prints is with all of the lights off (even the safelight) to put a fresh sheet of darkroom enlarging paper with the emulsion (or light-sensitive) side up in the middle of the room you want to use a darkroom. Put something on it that covers the paper (for example, car keys, batteries, or regular printer paper). Let it sit for at least an hour in your darkroom with the lights off. After the hour, develop the sheet of paper using the right process depending on your paper type (RC or Fiber-based paper for black & white development or fiber for color paper). If you can see the outline of the object or if the paper darkens in any way, then you need to make your darkroom more light-tight.
See this article about building a darkroom yourself for ways to make your darkroom more light-tight.
What Are Safelights in a Photography Darkroom?
Darkroom paper used for black & white printing is not sensitive to the entire light spectrum. Special filters or low wattage lights, called safelights, change the light in the darkroom to either red or yellow-amber, which the black & white paper can’t see or doesn’t react to. This makes it much easier for the person in the darkroom to move around and see what they are doing without exposing the darkroom paper to light and fogging / ruining it. However, keep in mind that even though safelights are safe to use on black & white paper, exposing darkroom paper to safelights for a long period of time will eventually affect the paper by fogging it and/or reducing the contrast of the paper (also known as safelight fog).
Unlike darkroom paper for black & white film, color printing papers are sensitive to the entire light spectrum. Making color prints in the darkroom requires a completely dark room without any safe lights on (there is a safelight for both black & white and color paper but it is a very dim yellow LED. So dim in fact, you can’t hardly see so it doesn’t seem worth it to me). Most color darkrooms have a light-tight processing machine that will develop color darkroom paper for you, however, they are very expensive to purchase and maintain yourself.
Is There an Alternative to Having Your Own Darkroom?
The good news is you don’t need a darkroom to process your own film. However, you do need a darkroom to make traditional darkroom prints (silver halide) from your negatives because you need to be able to control the light hitting the light-sensitive materials.
Below are a few ways to get access to a darkroom if you don’t have the money to build one or don’t have the space (although it doesn’t cost that much and it doesn’t take up that much space – see this article for how much it costs to build a darkroom).
1. Commercial labs
If you don’t have the facilities to process and print your own film there are commercial labs that will print a darkroom-based silver halide print (not ink jet) for additional cost. Some of these labs include:
However, much like using an auto-exposure mode on your camera, the results returned are typically default and can look generic. This is why it is a good idea to use a lab that communicates well and that you trust.
2. Community Darkrooms
If you don’t have a darkroom available to you or you don’t have one in your house, another way to get access to a darkroom is to join or take a class at a community darkroom like BushwickCommunityDarkroom.com or Phoenix Film Revival. If you live in a large city, it is likely that there is one nearby and it generally doesn’t cost that much. Also, check out Darkroom.Directory website for a list of community darkrooms across the US and darkrooms across the Europe.
With community darkrooms, you can actually save money since you don’t have to worry about buying and refreshing chemicals and equipment for developing film, just the film and darkroom paper (see this article for more about what darkroom paper to purchase).
Why Do You Want Your Own Darkroom?
While there are ways to access a darkroom without having one in your house (like mentioned above), having your own darkroom to develop your film and make prints provides you with other realms of creative control. You can take the time to experiment so you can obtain the look and style you want. Also, putting together your own darkroom isn’t that expensive (or purchasing a kit) compared to even just a decade ago and it doesn’t take up that much space.
As with any aspect of photography, film processing and printing have technical and creative components. The way you process a film or print determines aspects of how the finished results appear just like with digital post processing a digital negative in Adobe Lightroom or Photoshop albeit in a much more magical and physical way. When you process your own film and prints, you can control the:
- Type of chemical used (different types of developers bring out different parts of the image)
- Strength of the chemicals (if they are fresh / newly mixed or have been used)
- Length of development time (pushing or pulling the film through development)
- Agitation of the developing tank (how long and what direction or if any agitation was used at all)
Each of these aspects can affect the look of the film or print. Skilled photographers can control contrast and the appearance of the film grain. They manage this depending on how they develop their films. Film manufacturers always provide recommendations but with experience, photographers can manipulate the variables to create the look they desire.
Printing your own photos in the darkroom allows for similar flexibility. But even before developing a print, a photographer has more opportunities for creative expression. For example, by dodging and burning areas of a print they can make it lighter or darker and using different contrast filters can add or remove contrast in the overall image. The photographer uses different tools such as these to control the amount of light affecting the photosensitive paper and the outcome.
For learning about how to create prints in the darkroom, I recommend reading the 3 book series by Ansel Adams (easily the most famous and technically brilliant photographer ever) about creating in the darkroom called, “The Camera”, “The Negative”, and “The Print”. Obviously, “The Print” is the book that is most applicable here but all three are a treasure trove of solid information taught by a master photographer for anyone wanting to learn how to get the most out the darkroom and their film camera.
Alternatives to A Permanent Darkroom
You may have decided that you want to build a dedicated darkroom in your garage but you may not have enough space. Another option for darkroom that is not permanent that you can set up when you want to use it or travel with it. The company Ilford Harmon in England, which makes a lot of darkroom products (such as black & white film, darkroom paper, and darkroom chemicals like this starter kit) recently announced a new portable pop-up darkroom that is basically a light tight tent that can easily be set up and taken down. The tent is large enough to make prints or develop film inside.
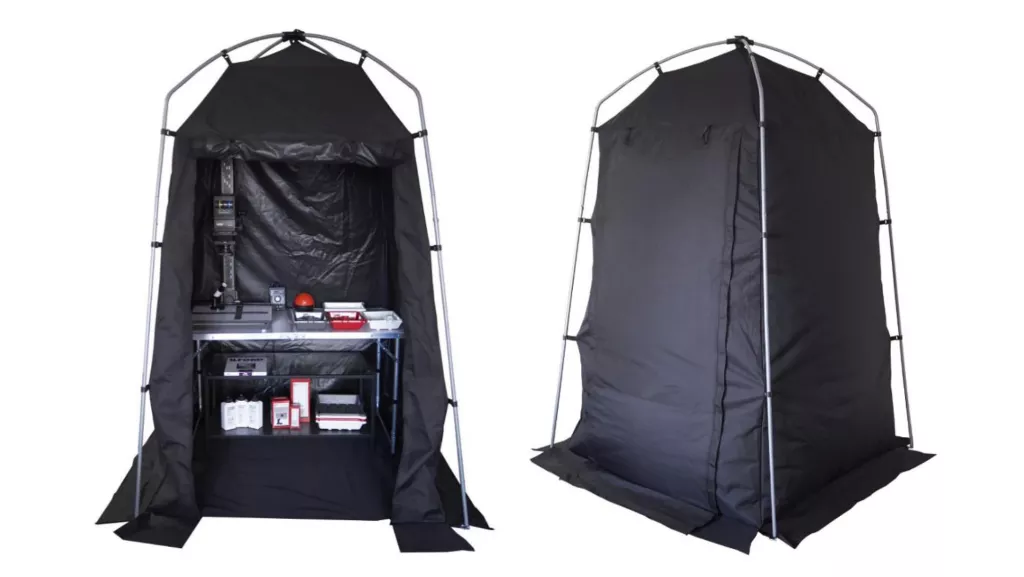
The pop-up darkroom will be 7.2 ft (2.2m) tall and has a space inside of 4.2ft x 4.2ft (1.3m x 1.3m) which is big enough for a table for your enlarger and chemicals so you can develop film or make prints. It has a protective mat so it won’t ruin your floors if used indoors. It also has a built-in air vent at the top and bottom to help with air circulation. The whole tent fits into a supplied storage bag and measures 26.6in x 9.8in x 9.8in (68cm x 25cm x 25cm) and weighs 17.5lbs (8kg).
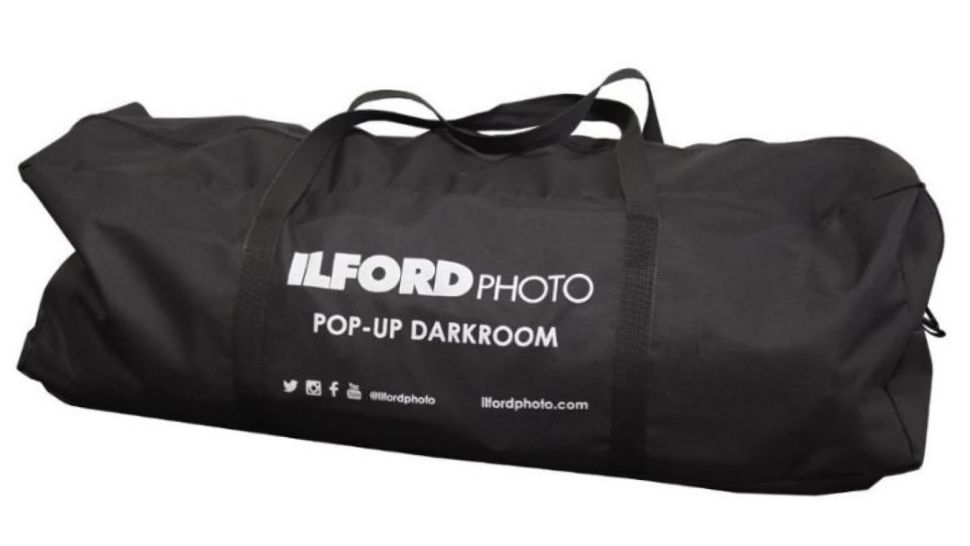
The pop-up darkroom is available at the time of writing from two places online but is backordered and will be available soon. It can be purchased at b&h.com for around $310 and freestylephoto.biz (the cheaper of the two) and costs around $250 USD at the time of writing. See this article for more information about the Ilford pop-up darkroom.
Ilford recently also announced a darkroom starter kit in partnership with the company Paterson that offers everything that is needed to make a print, except for an enlarger and a safelight. At the time of writing, the kit costs around $140 USD and pairs well with the tent. The darkroom starter kit includes the following:
- 1 x Ilford Multigrade RC Deluxe Pearl Paper 8×10” 25 sheet box
- 1 x Ilford Multigrade Developer 500ml bottle
- 1 x Ilford Ilfostop 500ml bottle
- 1 x Ilford Rapid FIXER 500ml bottle
- 1 x Paterson 1200ml Graduate Cylinder
- 1 x Paterson 150ml Graduate Cylinder
- 1 x Paterson Chemical Mixer
- 1 x Paterson Thermometer Small (9”)
- 3 x Paterson 8×10 Trays (Red / White / Grey)
- 3 x Paterson Print Tongs (Red / White / Grey)
- 1 x Paterson Micro Focus Finder
In Conclusion
Film photographers need a darkroom if they want full technical and creative control. It is possible to process your film without a darkroom, but it is difficult to produce traditional darkroom prints without a proper one.
If you have a darkroom where you can process and print your film, you have more control over the creative process. Sending your film to a lab for processing and/or printing will not always provide the look and feel you want for your images, unless you have a well-defined goal for your images. Labs tend to stick rigidly to the recommended processing instructions. Your images will be well processed but may lack character.
By processing your own film and making prints in your own darkroom, you can cultivate a feel for the contrast and grain appearance. When printing your own images, you have even more creative control. Achieving a specific look for your film and prints takes time, practice, and experimentation.
As you start out, follow the instructions closely. When you consistently produce good results, begin to experiment. Change one aspect of the process at a time and see how this affects the look of your film and prints. This is how you can make the most creative use of processing and printing film in a darkroom.