
Developing your own film at home is a great alternative to sending it off to a print store. It doesn’t matter whether you are a professional photographer who learned how to develop your own photography film in a dark room or a novice just learning how to shoot film for the first time, this is a process that can be very rewarding and fun to learn. However, you might be put off by the harmful chemicals used in the film development process and wondering if there are more eco-friendly and safe alternatives.
Environmentally friendly darkroom film development is more simple than it may seem. For example, you can replace the stop bath with a short water rinse or use darkroom chemicals designed to be more environmentally friendly, like LegacyPro EcoPro products. You can also use basic household ingredients such as coffee, beer, and even red wine to develop film without all of the harsh chemicals.
Without some of the chemicals, or using chemicals designed to have low toxicity, you will still be able to develop film while sparing your health, the environment, and yourself from some of the negative side effects of photographic chemicals. Below, we will discuss the in’s and out’s of developing color and black and white film at home with some more environmentally friendly and safer methods.
Why Develop Film at Home With Less Harmful Chemicals?
While taking your film rolls to the local photography shop and dropping it off at the counter might be fast, efficient, and involve little effort, there are many reasons as to why you should develop your own film at home without using as many toxic chemicals as possible.
Developing Film The Traditional Way Can Be Expensive
The cost of analog film development has skyrocketed over the past decade with the rebirth and resurgence of film photography. This renaissance is great for the photographic film industry while keeping the tradition of film photography alive.
However, over time it can add up to be very expensive for photographers to send their film off to get developed through the mail. Although it can also be expensive to set up your darkroom to develop film in an environmentally way at the beginning, overall you will end up saving a lot of money in the long run because you can purchase the necessary materials in bulk. Many of the items needed to make these eco-friendly film developing processes are less expensive than more traditional chemicals and methods. Also, the more environmentally safe darkroom chemicals are about the same cost of traditional chemicals and sometimes even cheaper, depending on how much you purchase. They also will last much longer in storage and you can dilute them more than traditional darkroom chemicals from companies like Kodak and Ilford.
Developing Film Can Impact the Environment
Choosing to forgo some of typical of the film developing chemicals in exchange for more environmentally safe ones is great for the environment. Most film chemicals are toxic and should never be poured down the drain in large quantities, like color and black and white film darkroom chemicals (especially if you have a septic tank).
However, It is possible for spent darkroom chemicals (spent meaning they don’t work anymore) for color and black and white film developer and stop bath for film and darkroom paper to be poured down the drain if you combine some together in equal amounts in a specific order and dilute them well enough by following the solution down the drain and running cold then hot water afterward. However, fixer has silver in it that can contaminate the environment or damage your septic tank. When they are disposed of in this manner, they will disrupt the balance of bacteria in your septic tank, often leak into our sewage systems, causing more harm to the environment. Developing film with more eco-friendly substances like coffee, beer, or red wine and more biodegradable darkroom chemicals helps to alleviate all of this harm. Therefore, it is important to dispose of photographic darkroom chemicals correctly.
See this article I wrote about how for more information about how to safely dispose of darkroom chemicals.
There Are Ways To Develop Film That Is Better For Your Overall Health
In the same way that using more safe and environmentally friendly photographic darkroom film chemicals is better for the environment, it is also better for your individual health. Film chemicals like the fixer and developer solutions for black and white photography are made of hazardous substances that should never be ingested, or have contact with your eyes or skin. It is possible to develop allergic reactions when exposed repeatedly over several years through skin contact or breathing in the chemicals while mixing. Using less toxic darkroom chemicals when developing film at home can help to reduce most of the health dangers of developing film entirely.
Read this article I wrote about how to handle all darkroom film chemicals correctly.
Can Photographic Darkroom Chemicals Be Dangerous?
Though film photography is not typically considered high risk or a dangerous occupation, long-term and prolonged contact with darkroom chemicals typically used to develop film can have health-related side effects. These side effects can be:
- Burns
- Dizziness
- Central Nervous System Failure
- Vomiting
- Headaches
- Depression
- Lung Cancer
- Dermatitis/Rashes
- Allergic Reactions
- Other forms of Cancer
In general, avoid long-term exposure to toxic film chemicals if possible, and do not come in contact with them by skin absorption, inhalation, and ingestion.
However, keep in mind that most, if not all, of these side effects, can be avoided by using less toxic darkroom chemicals (see below) and setting up your darkroom correctly (for example, making sure you have proper ventilation when developing prints and mixing chemicals as well as using gloves when developing and mixing chemicals). See this article I wrote about how to properly set up a darkroom in your house and read this article I wrote for more information about handling darkroom chemicals properly.
Photographic Darkroom Chemicals and Pregnancy
As seen above, photographic darkroom chemicals can create lasting health impacts on healthy people. This means that they can also have a negative effect on anyone who is pregnant or nursing, as well as unborn children.
Pregnant women should avoid exposure to these chemicals altogether, but if avoidance is impossible, avoid prolonged exposure (for example, several hours at a time) and whenever in close proximity to the chemicals, use:
- Respirator
- Proper ventilation
- Gloves
- Protective gear
Darkroom Chemical Smell Sensitivity
In some people, regular use of darkroom film chemicals without proper ventilation or protective equipment like gloves can also activate MCS, or Multiple Chemical Sensitivity. MCS is an extreme sensitivity to any manufactured or chemical smells that do not originate naturally in the environment. If you are someone prone to headaches or have a sensitive sense of smell, using film chemicals can amplify that sense and trigger other symptoms.
Can you Develop Color Film Without Darkroom Chemicals?
Black and white film requires only a handful of chemicals in order to process and is far more forgiving during the development process compared to color film. Therefore it is possible to develop black and white film without most of the darkroom chemicals at home. The methods discussed below don’t even require the use of a stop bath (which is exchanged for a water rinse). I also recommended a more eco-friendly traditional film fixer designed to have the lowest levels of toxicity and still be effective.
However, you can use the processes below to develop color film (using Coffee, Beer, or Red Wine) but the film will not be in color and more likely be stained with whatever process you are using (brown if using coffee and red if using red wine). If you are interested in developing color film at home with traditional methods, see this article I wrote about how to develop 35mm or medium format color film.
How To Be Eco-Friendly When Developing Photographic Film
The best way to be eco-friendly when developing film is to say goodbye to some of the typical darkroom film developing chemicals and consider some alternatives to traditional film developers instead that don’t even require the use of stop baths. These can include but are not limited to using:
- Coffee
- Beer
- Red Wine
If you aren’t interested in to mixing your own solutions for developing black and white film an alternative is to use darkroom chemicals that are designed to have low levels of toxicity but still be effective. The company LegacyPro produces a line of darkroom chemicals called EcoPro that are:
- Virtually Odorless
- Non-corrosive
- Free of known carcinogens and mutagens
- Free of non-biodegradable organic compounds: EDTA and DTPA
- Free of acetic acid, perfume, and dye (will not burn skin on contact)
- Free of Metol, hydroquinone, borates, and phosphates (this means it will not harm plants)
General Steps for Developing Black and White Film at Home
Before we get to the specific steps of alternate ways to develop film using more eco-friendly methods, it is important to understand the general steps for developing black and white film the traditional way. Below are the general steps:
Step 1: Rewind your film in the camera after taking images. Your camera may do this automatically or you may have to this manually. Remove your film canister or film reel from the camera and set up your film and supplies needed to load your film into the developing tank in a film-changing bag or in complete darkness.
Step 2: Load your film on to the developing tank film reel and load it into the developing tank using complete darkness or a film changing bag. Once your film is loaded into the development tank you can turn on the lights and/or remove it from the film changing bag.
Step 4: Pre-Soak your film by filling your development tank with distilled water and letting it sit for about 5 minutes. This helps to prepare the film for development.
Step 5: Mix all of the solutions needed following the product directions.
Step 6: Follow the specific steps to develop your film in the development tank using specific solutions. For traditional photography, it involves three chemicals – the film developer, the stop bath, and the fixer.
The film developer actually develops the negatives, the stop bath solution stops the developing process, and the fixer solution makes it so the images are “fixed” onto the negatives by making them not sensitive to light anymore. In the traditional process, it is important to know the temperature of your developing chemicals so you know how long to have them in your developing tank. The developing chemical is the most important while the film is in the other two chemicals around 30 seconds with the stop bath and around 5 minutes with the fixer solution.
Step 7: Wash the film under running water in the development tank for about 5 minutes. This helps to wash away residual chemicals on the film before drying.
Step 8: Gently remove the negatives from the developing tank including the film reel and hang them up to dry. I recommending hanging them over a bathtub or large tub to dry (they will drip water and you need something to catch it) and using a clothespin to hold the film strip onto a rope or curtain rod while they hang and a clothespin on the bottom of the film strip to keep it from curling up while drying.
Step 9: Use distilled water to preform a final rise of the film to eliminate water spots on your dried film. To do this, first use running tap water to flush the remaining fixer out of the tank for 5 minutes. Pour the water out of the tank down the drain. Fill the developing tank with distilled water. Agitate for 30 seconds and pour the water down the drain an repeat for a second time.
Note: some people like to use a product called Photo-Flo made by Kodak or a similar product made by Ilford. However, I find that washing your film before hanging it to dry with distilled water several times works wonders.
Step 9: Let the negatives hang to dry for anywhere between 2.5 – 5 hours, depending on variables like humidity and how cold or warm the bathroom is.
Step 10: Scan the images to share on social media or make a print in the darkroom!
Iford Pop-Up Darkroom
The darkroom company giant, Ilford Harmon, recently announced a new portable pop-up darkroom that is basically a tent that is light tight and can easily be set up and taken down in which you can make prints or develop film. The pop-up darkroom will be 7.2 ft (2.2m) tall and has a space inside of 4.2ft x 4.2ft (1.3m x 1.3m) which is big enough for a table for your enlarger and chemicals so you can develop film or make prints. It has a protective mat so it won’t ruin your floors if used indoors. It also has a built-in air vent at the top and bottom to help with air circulation.
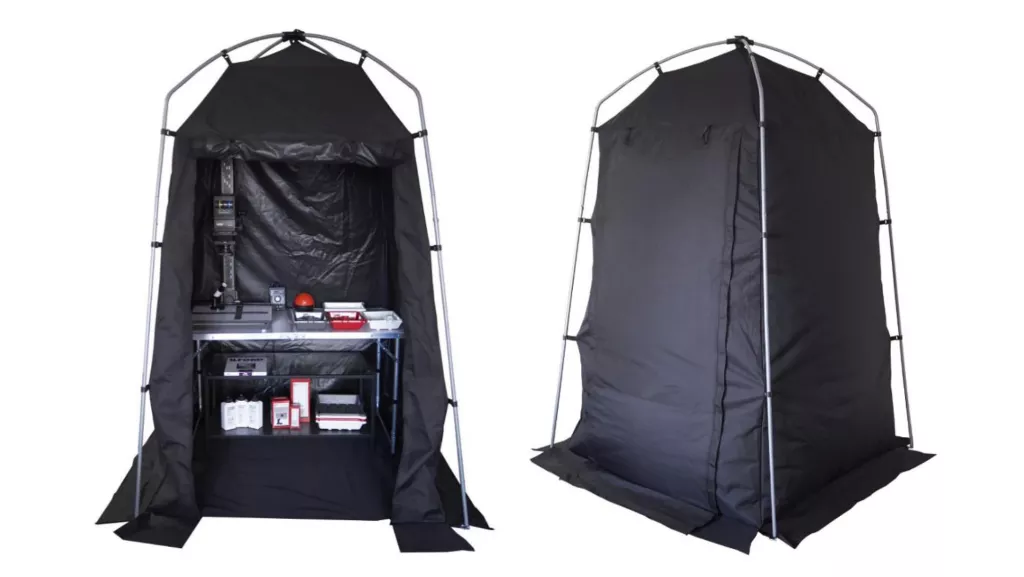
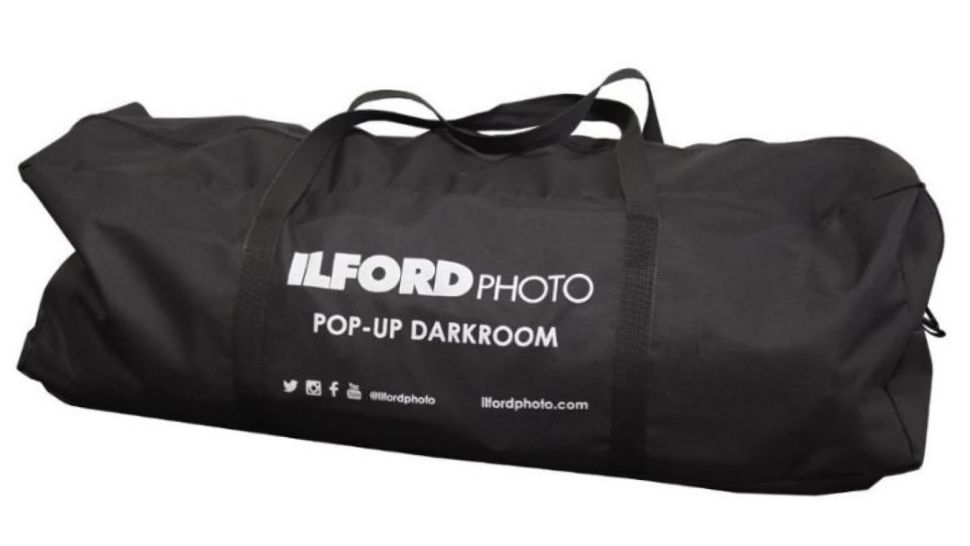
The entire thing fits in the supplied storage bag and measures 26.6in x 9.8in x 9.8in (68cm x 25cm x 25cm) and weighs 17.5lbs (8kg). The pop-up darkroom will go on sale in November of 2021 and will cost around $265 USD. Find more information about this product on this website.
Ilford recently also announced a darkroom starter kit in partnership with the company Paterson that offers everything that is needed to make a print, except for an enlarger and a safelight. This will cost around $150 USD and includes the following:
- 1 x Ilford Multigrade RC Deluxe Pearl Paper 8×10” 25 sheet box
- 1 x Ilford Multigrade Developer 500ml bottle
- 1 x Ilford Ilfostop 500ml bottle
- 1 x Ilford Rapid FIXER 500ml bottle
- 1 x Paterson 1200ml Graduate Cylinder
- 1 x Paterson 150ml Graduate Cylinder
- 1 x Paterson Chemical Mixer
- 1 x Paterson Thermometer Small (9”)
- 3 x Paterson 8×10 Trays (Red / White / Grey)
- 3 x Paterson Print Tongs (Red / White / Grey)
- 1 x Paterson Micro Focus Finder
A Case For Using A Traditional but More Eco-Friendly Fixer
While there are ways to make your own fixer but these methods either use chemicals more harmful than traditional fixer if handled incorrectly (I’m looking at you Sodium Thiosulfate and Ammonium Thiosulfate) or take over 48 hours to get just ok results compared to 5 minutes with a more traditional but less toxic fixer.
Therefore, I recommend using a fixer that more eco-friendly and has low levels of toxic chemicals and is just as effective as a traditional darkroom fixer. I specifically recommend using the LegacyPro EcoPro Neutral Fixer. This darkroom fixer differs from other traditional darkroom fixers because it is:
- Virtually Odorless
- Non-corrosive
- Rapid Fixer / Non-hardening (this refers to being able to be used with modern films. )
- Effectively removes dyes on the film or dyes from staining-type developers
- Free of known carcinogens and mutagens
- Free of Metol, hydroquinone, borates, and phosphates (will not harm plants)
- Free of non-biodegradable organic compounds: EDTA and DTPA
- Free of acetic acid, perfume, and dye (will not burn skin on contact)
- Designed to shorten processing time and minimize water usage
- Designed to minimize chemical wastage when used with paper
- Designed for the highest level of archivability
- Has extended mix and shelf life compared to other fixers
- Mixes to make 1.25 – 3 gallons
LegacyPro EcoPro low toxicity darkroom chemicals come in formulations for both black and white film and darkroom paper since you need different developers for film and darkroom paper. However, they do not offer chemicals for color film development. You can find some of the EcoPro products on amazon.com but the website freestylephoto.biz has more options to choose from, have the same and larger quantities, and are less expensive overall.
The LegacyPro Eco Pro Neutral fixer for black and white film can fix up to 25 rolls of 35mm or medium format film per liter (1/3 a gallon) using a 1:4 dilution, rising with running water for 1 min, fixing for 2 – 5 minutes, washing the film under running water for 4 minutes.
If you want to use the LegacyPro Eco Hypo Wash for you will need to add a few steps to the above process: rinse with running water for 1 min, fix for 2 – 5 minutes, wash the film under running water for 1 minute, wash the film in a 1:19 dilution of Hypo Wash for 3 mins, and washing the film with running water for 3 mins. With this method, you can wash up to 30 rolls of 35mm or medium format film and it can also remove the pinkish tint of residual dye on the film. However, removing this tint is not necessary for getting good scans or prints in the darkroom but it will shorten exposure time in the darkroom and make negatives easier to see on a lightbox.
In some ways, this fixer from LegacyPro is better than other traditional darkroom fixers. For example, this fixer can fix over 180 rolls of film (30 rolls of 35mm and medium format film per liter and the product comes in containers that mix with water to make 6 liter or 2 gallons). This fixer can also be used with or without a stop bath because of its ph level, which can neutralize any acid brought over from the developer. Because of its neutral ph level, your film can be safely fixed for longer than the recommended 5 minutes without any harmful effects to the film and films may also be washed longer than necessary. Here is a link to the instructions for using the LegacyPro EcoPro Neutral Fixer if you’d like to know more specific information.
For mixing working solutions of the LegacyPro EcoPro Neutral Fixer, I recommend glass containers like these on Amazon.com and storing them in a cool and dark place.
*Note: Even though the neutral fixer from LegacyPro EcoPro has a lower toxicity than traditional darkroom fixer from other companies like Kodak and Ilford, proper precautions should be used like mixing it outside so there is plenty of ventilation while wearing gloves and eye protection. Also, using wearing gloves when pouring it in and out of the development tank.
Items To Purchase and Steps To Take Before Developing Film
Even though below you won’t be using all the traditional darkroom chemicals to develop your film, there are some items and steps you will need take before developing to ensure your film is developed correctly and consistently. These items include:
- Film development tank
- Film changing bag
- Graduated Cylinders (to measure the ingredients)
- Scissors (cut the film off the canister for 35mm or the reel for medium format film)
- bottle opener (to open the 35mm film canister)
- Distilled Water (mix with the ingredients because tap water can have things like chemicals or lime that will give you lesser results)
- Rubber Gloves (to mix the ingredients)
- Kitchen Thermometer (to measure the temperature of the developer and ingredients when mixing the fixer)
- Film Fixer / Containers (Environmentally friendly film fixer and containers to hold the solution once mixed)
The main item you will need is a film development tank. Since all film is light sensitive, exposing your film to light after you have taken your image but before developing it will ruin your images. A film development tank allows you to develop film without having to be in the dark. I recommend this film development tank on Amazon.com because it can develop both 35mm and 120mm (or medium format film) and is easy to use.
Also, you will need a very dark room to load your film tank (many people use a dedicated light-tight space called a darkroom to develop film, but that is not required. Because your film development tank is light-tight, as long as you make sure that undeveloped film isn’t exposed to light when loading it into your development tank, your developing process will work just fine. I recommend using a film-changing bag rather than a dark room, like this one from Amazon.com, to load my film tank. I recommend this bag because it is well-made, durable, and convenient in size.
Next, you will want to remove the film you want to develop from the film canister if 35mm film, or from the film reel if developing medium format film. See this article I wrote about how to properly remove your film from the canister or film reel and how to load your film into a film developing tank using a room in complete darkness. If you don’t have access to a darkroom or don’t know if your room is dark enough to load your film tank correctly, then read this article I wrote about loading your film tank using a film changing bag.
Once you have your film loaded into your film tank then you are ready to move on to the next steps.
How to Mix Your Eco-Friendly Film Fixer
Before you start developing your film, you will need to mix your fixer. As stated before, I recommend using the LegacyPro EcoPro Neutral film fixer because it is most environmentally friendly and safer fixer than others you can purchase.
Since the LegacyPro EcoPro Neutral Fixer is packaged as a liquid concentrate, you will need to dilute with distilled water before use. According to the package, mix 1 part of fixer concentrate with 4 parts of distilled water (1+4 dilution ratio from the product manual).
NOTE: For best results, use distilled water when mixing darkroom chemicals because tap water can have chemicals and/or organic material like lime that will give you less than ideal results.
Follow these steps for how to mix your LegacyPro EcoPro Neutral film fixer:
Step 1:
Decide on how much fixer you are going to make. This will depend on the size of your development tank (option 1) or storage container (option 2).
Option 1: Since we know it takes 600ml, or around 2.5 cups, to fill the development tank and the dilution ratio is 1:4 (1 amount of fixer concentration to 4 amounts of distilled water) you are able to divide 600ml by 5 (I got this number by adding the dilution numbers together) and it will equal 120ml. Because the ratio is 1:4, use 120ml, or about 1/2 cup, of the fixer concentration to 480ml (which is 120 x 4) or about 2 cups, of distilled water to make the 600ml of the solution to fill the development tank.
Option 2: Another option is to mix the solution for the container you will store the fixer in between uses and then pour only what you need into the development tank. These glass containers from amazon.com are 32floz, or 4 cups. So you will divide 32floz by 5 to get 6.4floz. Because the ratio is 1:4, use 6.4floz, or about 1 cup, of the fixer concentration to 25.6floz (which is 6.4 x 4), or about 3 cups, of distilled water to make enough the 32floz of the solution to fill glass container of working solution.
Step 2:
Fill a graduated cylinder (like one of these from amazon.com) with distilled water that you want to mix with the liquid concentrate to the recommended temperature. In this case, the distilled water temperate should be 68 F (or 20 C).
To do this effectively, use the water bath method by filling a jug or graduated cylinder with the amount of distilled water you intend to use and put the bottom half of the container into a cold or warm water bath of tap water (I recommend using a kitchen pot or a shallow container in a sink) to cool or heat the distilled water to the desired temperature measured by a kitchen thermometer to get the correct temperature, 68 F (or 20 C).
Step 3:
Measure the amount of distilled water you need and use a funnel to pour it into a storage container large enough to handle the amount of solution needed or a container that you will use to mix the fixer with distilled water before pouring the solution into the development tank.
Step 4:
Measure the amount of fixer concentrate you need and use a funnel to pour it into a storage container or mixing the container with the distilled water. Make sure to mix the solution together measure the solution to make sure it is around 68 F (or 20 C). If not, use the water bath method above to raise or lower the temperature as needed. Let the solution sit for 3 – 5 minutes before using.
Note: If using a kitchen utensil like a plastic spoon do not use it again for making, mixing, or eating food.
Step 5:
Since the fixer is made to be reused, once the film has been exposed to the fixer in the development tank use a funnel to pour the fixer from the tank back into the storage container. If you chose to mix just enough fixer for the development tank, then pour the fixer in another container until needed again. Store the container in a cool, dry place for up to 12 months.
Tip: Consider purchasing this little bottle of Hypocheck to test if and when your fixer has lost its power to fix film (or paper) when using a large solution you pour out into the development tank or paper tray and back into the storage container. All you have to pour a small amount (less than an fluid ounce) into a small container and put a couple of drops of hypocheck into the small amount of fixer you just poured out. If the solution turns cloudy that means it is exhausted (depleted of fixing potential) but if nothing happens the fixer it is still good to use. Since the hypocheck doesn’t change your fixer, you can pour the small amount back into the storage container and continue using it until exhausted.
If you are interested in using the Hypo Wash with film and both RC and Fiber-based photographic paper (since it will reduce the amount of washing time for fiber-based paper), see this link to the product manual.
Developing Photos at Home with Coffee
Caffenol is a common way of developing film at home using substances you can find in your house and/or kitchen including coffee. One of the ingredients is washing soda (also known as laundry booster) is commonly used in making homemade laundry detergent among other things.
What is Caffenol?
Caffenol is a process where washing soda, instant coffee, and vitamin C powder are used as a alternative solution for developing film.
The Materials and Ingredients
In order to make a good batch of Caffenol for your home developing purposes, you will need the following substances and materials:
- Rubber Gloves
- A Dry and Clean Plastic Tub
- Measuring Cups & Spoons (only use wooden or plastic)
- Vitamin C power
- Instant coffee (only full caffeine, not decaf)
- Washing soda
- Distilled Water
- Plastic container for mixing the ingredients
- Film Fixer / Containers
How to Mix and Develop Your Film with Coffee
To make 1 liter (roughly 4 cups) of Caffenol film devoper:
- Measure out:
- 1 liter (4 cups) of distilled water at room temperature (68 F or 20 C)
- 3 Teaspoons (or 20g) of vitamin C powder (9 Teaspoons if the washing soda is made of crystals)
- 18 Teaspoons (or 45g) of instant fully caffeinated coffee
- 12 leveled Teaspoons (or 24g) of washing soda (multiply by 2.7 if the washing soda is made of crystals)
- Mix all of the ingredients together except for the washing soda in a clean and dry plastic tub using a plastic or wooden spoon. Do not use metal, glass, metal, rubber, or silicone containers.
- Stir the mixture until there are no coffee grounds visible.
- Stir in the washing powder until it has completely dissolved.
- Let the mixture sit and wait 5 minutes until all bubbles have dissipated.
- Pour all of the ingredients into a developing tank and agitate very slowly 3 times per minute for 11 minutes.
- Pour out the Caffenol mix into a safe container. Pour tap or distilled water into the tank and constantly agitate it for 1 minute. This acts as a stopping solution in traditional film development.
- Pour the mixed fixer solution into the developing tank
- Add the fixer mix to the tank and stir/agitate slowly one time per minute for a total of 5 minutes. If using Ilford Delta 400 film then fix between 5 – 8 minutes.
- Pour the fixer solution out of the development tank and into a storage container using a funnel until you have enough to dispose of properly or until it is depleted. (See this article on how to dispose of darkroom chemicals correctly).
- Add a few drops of clear, unscented, and dyefree dish soap (or dishwasher rinse aid) into enough distilled water to fill the tank – likely 600ml (or about 2.5 cups) – in a container. Add it to the tank and mix. Mix slowly to limit bubbles. Agitate for 3 times. Pour out the liquid and repeat the process while agitating 6 times. Pour out the wash and repeat the process agitate for 12 times. Pour out when complete. (this process will limit hard water spots).
- Open up your film tank and remove your film from the tank and film reel to hang it to dry. Do this over a bathtub using clothes pins on the top to hold it up on a rope or curtain rod and on the bottom to held it dry straight.
Some Tips:
- Not being precise with the measurements of your ingredients can affect your end results so check your measurements multiple times.
- Undissolved washing powder crystals will scratch the film as they dry so make sure they are completely dissolved when mixing
- The solution should be at a stable 68F (or 20C) before developing. If it is too hot then wait for it to reach room temperature. If the solution is too cold then you can heat it up slowly by using the water bath method mentioned above measuring the temperature with a thermometer.
- See this article for a complete development chart using this recipe on different films and ISO (even color films).
- Watch this excellent video on Youtube on how to properly agitate your film in the development tank with the immersion process. Be sure you have the lid and cap for your tank on correctly when using this method.
- Instead of using dish soap or dishwasher rinse aid. You can also just use distilled water to eliminate water spots on your dried film. To do this, first use running tap water to flush the remaining fixer out of the tank for 5 minutes. Pour the water out of the tank down the drain. Fill the developing tank with distilled water. Agitate for 30 seconds and pour the water down the drain an repeat for a second time.
- See this article on how to dispose of darkroom chemicals, like fixer, correctly.
Sources:
- https://www.fieldmag.com/articles/how-to-develop-film-with-coffee-caffenol-guide
- https://www.caffenol.org/
Developing Photos at Home with Beer
If you thought coffee was an exciting alternative to traditional film developers, you’ll love the next safe and environmentally-friendly development method. This specific method uses beer to create a mixture called Beerenol C.
This film development style is a dream come true for the photographer on a budget because you can use any type of beer you want. Whether you spring for your favorite IPA or decide to stay on budget with the cheap lager, all beer works great to help create this homemade film-developing solution. In fact, in 2019 the craft brewery Dogfish Head teamed up with Kodak to create a drinkable beer specifically designed to develop film and called it Supereight. The beer is a Super Goose style beer with high levels of acidity and vitamin C that made it perfect for use in film development.
What is Beerenol C?
Beerenol C is a mixture of:
- Beer
- Washing soda
- Vitamin C powder
- Iodized salt
The use of Beerenol C has been around for quite some time but was popularized in the late 1990s by street and skate photographers.
The Materials and Ingredients
In order to make the perfect solution of Beerenol C for your film developing purposes, you will need the following substances and materials:
- Rubber Gloves (to mix the ingredients)
- A Plastic Tub
- Measuring Cups & Spoons (to measure out the ingredients)
- Beer (I recommend a lager, like Budweiser, but most any will work including Guinness)
- Washing soda
- Iodized salt
- Vitamin C powder
- Glass jar or container for mixing
- Film Fixer / Containers
How to Mix and Develop Film With Beer
- Prepare all your substances and lay them out on a counter.
- Bring 700ml (about 3 cups) beer to room temperature at about 86 F (or 30 C).
- Pour the warm beer into a glass jar or container and mix it with 5.5 teaspoons of washing soda first to make the beer flat. Once flat then add a 2.5 teaspoon of vitamin C.
- Stir the mixture until all of the powder has completely dissolved. This can take anywhere from 10 to 20 minutes.
- Pour the developing solution into a plastic container so that it can rest for about 2 minutes.
- Measure the solution with a thermometer. The solution should be around 68 F (or 20 C), if not let it sit for a few minutes.
- Once the solution has reached 68 F (or 20 C) pour the solution from the plastic container into the development tank and set the timer for 20 minutes.
- Agitate the solution for 30 minutes without stopping. Then set the tank down on a level surface and agitate for 15 seconds every minute for 15 minutes.
- Tap the tank with your hands or on a surface (not too hard) once per minute for 4 to 5 minutes. This will remove any bubbles that are forming and prevent new ones from being created.
- After 20 minutes, empty the tank down the drain and replace it with room temperature tap water running into the tank for 5 minutes.
- Empty the water into the drain.
- Pour in the LegacyPro EcoPro darkroom fixer and agitate slowly one time per minute for a total of 5 minutes. If using Ilford Delta 400 film then fix between 5 – 8 minutes.
- Pour the fixer solution out of the development tank and back into a storage container using a funnel until you have enough to dispose of properly.
- This step is a final rinse of distilled water to eliminate water spots on your dried film. To do this, first use running tap water to flush the remaining fixer out of the tank for 5 minutes. Pour the water out of the tank down the drain. Fill the developing tank with distilled water. Agitate for 30 seconds and pour the water down the drain an repeat for a second time.
- Open up your film tank and remove your film from the tank and film reel to hang it to dry. Do this over a bathtub using clothes pins on the top to hold it up on a rope or curtain rod and on the bottom to held it dry straight.
Tips:
- Add the washing soda first to the warm beer to make it go flat. If you add the Vitamin C powder first, it will explode with foam.
- See this excellent video on Youtube on how to properly agitate your film in the development tank with the immersion process. Be sure you have the lid and cap for your tank on correctly when using this method.
- See this article on how to dispose of darkroom chemicals, like fixer, correctly.
Sources:
- https://www.digitaltruth.com/data/formula.php?FormulaID=172
- https://petapixel.com/2017/03/15/st-patricks-photo-tip-develop-film-beer/
Developing Photos at Home with Wine
Wineol is a photographic film developer made from red wine. Red wine can actually come in a variety of colors ranging from a near black-red to a lighter purple. It is made of fermented dark variety grapes and its alcohol content can vary. Red wine can contain magnesium, calcium, and vitamins such as B6.
Red wine is quite similar to coffee in that it contains caffeic acid. This is what makes it a very common alternative to other chemical film developing agents. Red wine is unique because not only does it develop your photographs, it also will tint your negatives for an aesthetic. Film that is developed with red wine can turn out red or brown tinted and is often used to get a vintage look on contemporary photographs.
The Materials and Ingredients
In order to develop film with a red wine developer solution, you will need:
- Measuring Cups & Spoons
- Rubber Gloves
- Red wine (any cheap red wine will work)
- Washing soda
- Vitamin C Powder
- Potassium Bromide
- Distilled water
- Film Fixer / Containers
How to Mix and Develop Film With Red Wine
- Set out all your ingredients on a table or counter.
- Weigh your ingredients and pour them into a measuring cup. You’ll need:
- 1 cup of red wine at 68 F (or 20 C)
- 1 fl oz washing soda
- 1/2 tbsp vitamin C powder
- 1/4 cup potassium bromide
- Add 500ml (or roughly 2 cups) of red wine and stir until everything has dissolved completely.
- If there are any lumps or chunks remaining in your mixture, get them out by using a strainer.
- Pour the mixture into the development tank and agitate the tank by tilting it back and forth about 4 times in 44 minutes. See the link below in the tip section on how to properly agitate your development tank.
- Pour out the solution down the drain and run tap water into the developing tank for 5 minutes
- Empty the water into the drain.
- Pour in the LegacyPro EcoPro darkroom fixer and agitate slowly once per minute for a total of 5 minutes. If using Ilford Delta 400 film then fix between 5 – 8 minutes.
- Pour the fixer solution out of the development tank and into a safe container until you have enough to dispose of properly. (See this article on how to dispose of darkroom chemicals correctly).
- This step is a final rinse of distilled water to eliminate water spots on your dried film. To do this, first use running tap water to flush the remaining fixer out of the tank for 5 minutes. Pour the water out of the tank down the drain. Fill the developing tank with distilled water. Agitate for 30 seconds and pour the water down the drain an repeat for a second time.
- Open up your film tank and remove your film from the tank and film reel to hang it to dry. Do this over a bathtub using clothes pins on the top to hold it up on a rope or curtain rod and on the bottom to held it dry straight.
Tips:
- The shorter the development time, the larger the film grain. If you want large grain in your images then develop for only 30 mins
- The negatives will come out very dense but will scan and enlarge well with a longer exposure time
- See this excellent video on Youtube on how to properly agitate your film in the development tank with the immersion process. Be sure you have the lid and cap for your tank on correctly when using this method.
- See this article on how to dispose of darkroom chemicals correctly
Sources:
- https://www.caffenol.org/2012/06/20/wineol-red-wine-developer/
- http://translate.google.com/translate?sl=auto&tl=en&js=n&prev=_t&hl=en&ie=UTF-8&layout=2&eotf=1&u=http%3A%2F%2Fwww.niklas-ruehl.de%2Fblog%2Ffilmentwicklung-mit-rotwein&act=url
Beautiful and Successful Eco-Friendly Photographs
When developing your film at home in your own darkroom or studio, going as chemical-free as you can is a great way to ensure the health of yourself and the environment while creating beautiful images.
Many photographers throughout centuries, including the legendary Ansel Adams, have developed their own film using all types of darkroom chemicals. Developing film at home without chemicals is one way to carry on their legacy today in a more environmentally friendly way.
Though making and mixing your own less-toxic solutions for developing photographs can be simple, cost-effective, and rewarding, always remember to wear protective gear including goggles, and to consult the product label and professional before mixing substances of any kind in an enclosed space.
Sources:
- https://www.digitaltruth.com/data/formula.php?FormulaID=169
- https://www.fieldmag.com/articles/how-to-develop-film-with-coffee-caffenol-guide
- https://www.digitaltruth.com/data/formula.php?FormulaID=172
- https://translate.google.com/translate?hl=en&sl=auto&tl=en&u=http%3A%2F%2Fwww.niklas-ruehl.de%2Fblog%2Ffilmentwicklung-mit-rotwein&sandbox=1
- https://www.caffenol.org/2012/06/20/wineol-red-wine-developer/
- https://www.digitaltruth.com/data.php?doc=stopfix
- https://www.digitaltruth.com
- https://www.freestylephoto.biz/static/pdf/product_pdf/ecopro/ECOPRO_Fixing_&_Washing_Instructions.pdf
- https://parallaxphotographic.coop/how-to-prepare-your-chemistry-for-film-developing/