Although most people use their phones to take pictures nowadays, some photography lovers still use cameras that require film. Most people are familiar with 35mm and 120 film but not many are familiar with 110 film.
110 film is a very small film format first produced by Kodak in 1972. It was popular from 1972 – 1994 due to the film’s small size, small cameras size, ease of loading and unloading film, and low cost. However, the small size of 110 negatives meant images were grainy and blurry when enlarged. Lomography began making film in 2011 and is the largest producer of 110 film.
110 film was all the rage at a specific point in history but eventually lost out to 35mm and digital cameras. All of the information that you may want to know about 110 film is included below.
How to Determine if Film is 110?
You may have some 110 film and aren’t sure if it is 110 film or not. To determine if the film you have is 110 film, look on the outside of the box for the number 110.
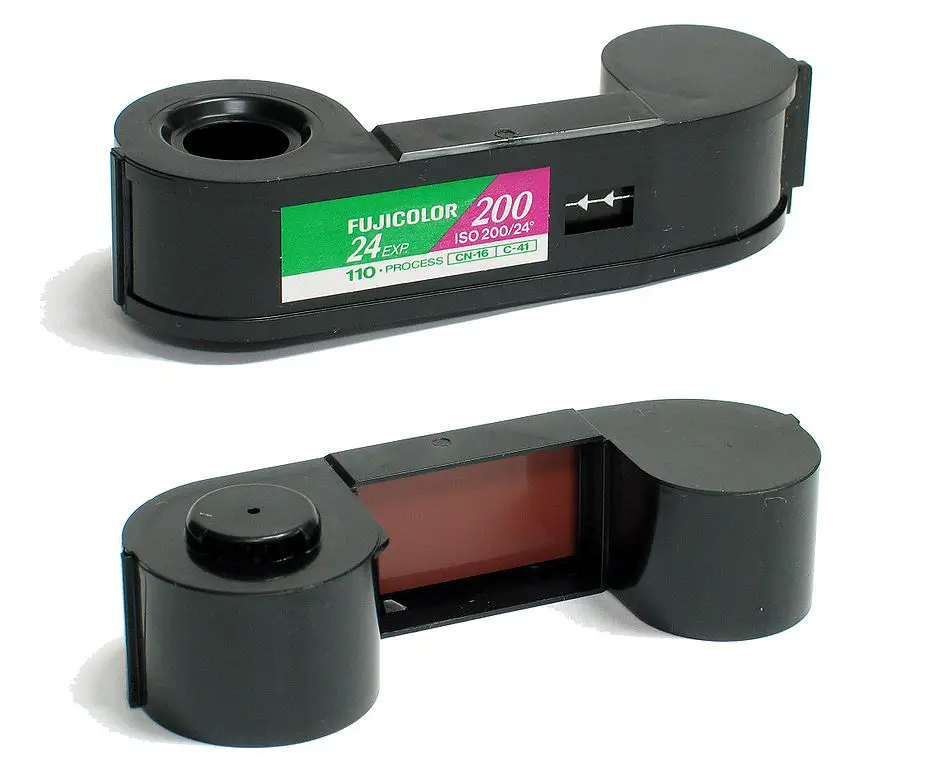
If the film is out of the packaging, the easiest way to know what kind of film it is look for the distinctive shape of the 110 film canister. 110 film doesn’t rewind like 35mm film and only winds in one direction so it has two areas to hold a spool of film on either side of the cannister. 110 film also has a unique window on the back of the film canister to show you what how many frames are left on the backing paper (similar to 120 or Medium Format film).
If all fails, you can also look for 110 on the film cassette to tell you what film it is, what type (color or black & white), the exposure count, and what ISO the film is.
When Did Kodak Stop Making 110?
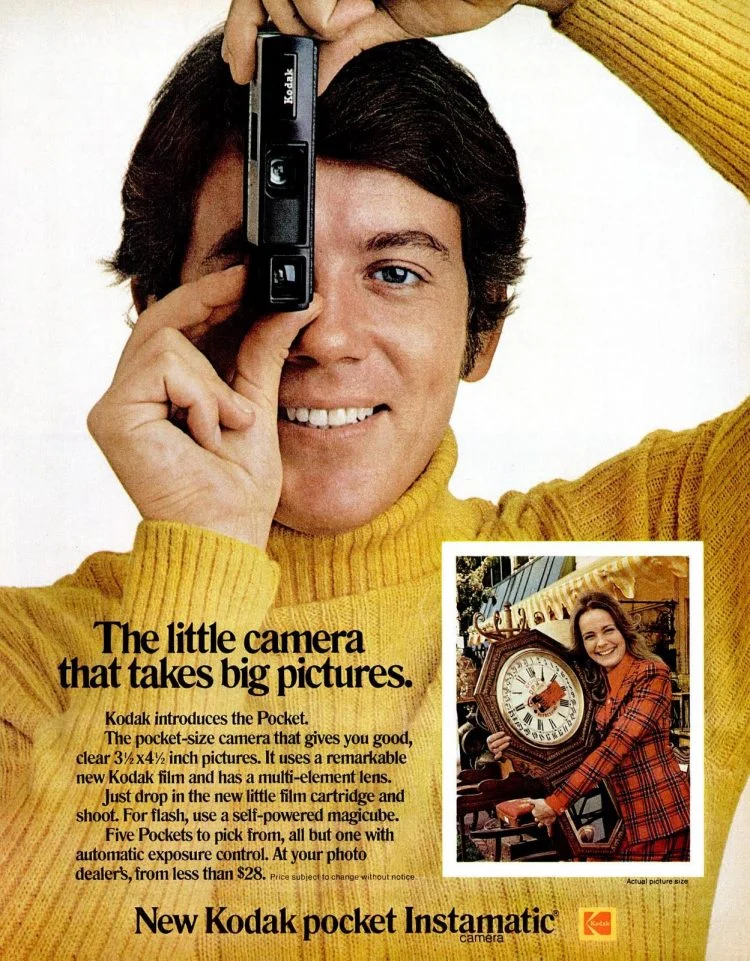
110 film was very popular when it was first released by Kodak in 1972, as a smaller version of their cartridge-based 126 film format allowing for smaller and more compact cameras to be made. With the 110 film designation, Kodak reused a film format name it used almost 70 years prior for roll film. However, Kodak stopped making 110 film camera in 1994 because of the low demand for the product due to 35mm taking over and the rise of digital cameras as well as the shortcoming of the films small size. Fujifilm also stopped producing the 110 film format until 2004 with Kodak stopping a few years later.
Even though Kodak stopped selling other versions of 110 film cameras in 1994, a slide version of 110 film was produced by Kodak until 1982 and a black & white 110 film version, called Verichrome Pan, was produced until 1995.
In its original run, 110 film was only popular for a short time because it was extremely sensitive to heat, the lSO was never really standardized (could be 64 or 100 ISO) and there were few 110 cameras that could read the tabs denoting what ISO was in the cassette making it hard to get a correct exposure. Also, since the film was so small (equivalent to 16mm film) the images were not very sharp and grainy when printed or enlarged.

APS Film Tried to Replace 110 Film
APS (Advanced Photo System)  was released in 1996 as a replacement for 110 film as an automatic and easy to load film canister similar to 35mm but a smaller size. APS film was double the size of 110 (1 inch wide vs 110 film 1/2 inch wide film) as a compromise to get sharper prints and enlargements.
Most APS cameras could produce film negatives in three sizes: the APS-C (for classic and 25.1 x 16.7 mm; aspect ratio 3:2), APS-P (for panoramic and 30.2 x 9.5 mm; aspect ratio 3:1), and APS-H (for HDTV and 30.2 x 16.7 mm; aspect ratio 16:9).
Interestingly enough, some modern digital DSLR cameras sensors that are full frame (24mm x 36mm and roughly the same as 35mm film negative) are called APS-C after this APS film negative size but actually smaller at 22.3×14.9mm for Canon cameras and 23.6×15.6mm for other brands like Nikon, Sony, and Pentax.
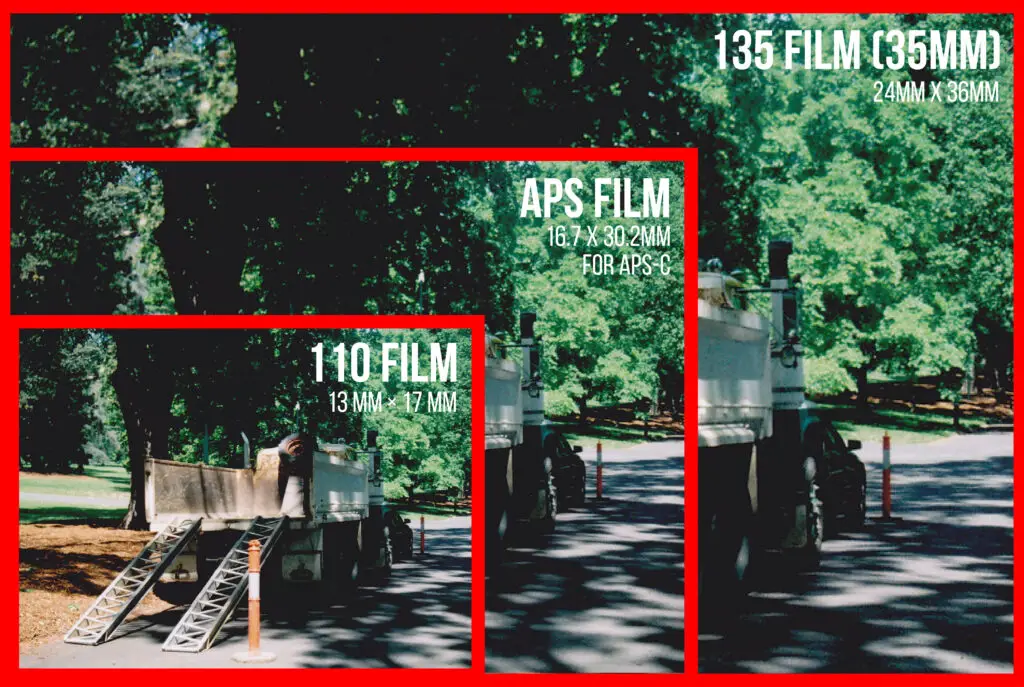
APS film tried to replace 110 film, but despite its ease of use (though it did have drawbacks ), APS film has not been in production since 2011
 while new 110 film is still being produced.
Does Anyone Still Make 110 Film?
In 2011 Lomography photography company began making 110 films again staring with their Peacock color slide film followed in 2012 by black & white film called Orca along with other 110 films in the following years.
New 110 Film Available
Below is a list of 110 film produced by Lomography (currently the only producer of 110 film):
- Lomography Orca 100 ISO black & white 110 film has bold contrast with 24 exposures and costs around $17
- Lomography Tiger 200 ISO color 110 film is gives you 24 exposures costs around $22.90 for a 3-pack
- Lomography Lobster 200 ISO redscale 110 film has warm shades of red, orange and yellow as well as gives you 24 exposures and costs around $9
- Lomography Peacock 200 ISO color slide 110 film has saturated blue, green and yellow tones give you 24 exposures and costs around $44 for a 3-pack
- Lomography Metropolis 100 – 400 ISO color slide 110 film is contrasy with muted tones and desaturated colors with 24 exposures and costs around
- Lomography Purple 100 – 400 ISO color slide 110 film gives you earthy reds, crisp plums and velvety violet hues with 24 exposures and costs around
Lomography will be unveiling it’s 7th new 110 film, the Lomography Turquoise 100 – 400 ISO color film, in Nov 2022.
Old & Expired 110 Film Available
You can also purchase old 110 film, however, since Kodak and Fujifilm stopped production of their 110 films in 2012 and 2004 so most 110 film unless made by Lomography will be expired and unusable since it won’t likely be stored correctly. Old 110 film can be purchased from online sellers or in antique markets. However, expired 110 film is notoriously finicky so shoot it your own risk:
- Ebay sells
 110 film for around $10 a roll but can also be purchased in bulk to save money.
 - Etsy sells
 110 film bundles for between $20 – $50
Can 110 film Still Be Developed?
110 film can still be developed and you can expect to pay between $9.96 – $14.99 (USD) for scans and a set of 4 x6 inch prints at Walgreens, Walmart, or CVS . However, these places won’t return your film negatives to scan at a later date and take a much longer time to process than other places. There are also many film development labs
 that will develop 110 film, scan it, and return your negatives for between $15 – $38.98 with digital scans or $10 – $20 for film development without digital scans.
Below is a chart that compares different labs across the US that can develop 110 film by in-store or through the mail:
Online Film Developer | Cost for Film Development with Scans | Cost for Film Development Only (no scans) | Cost for Prints | Return Shipping Included? | How Long? |
|---|---|---|---|---|---|
$17 with standard-sized scans (1024 x 1270 at 3.75MB) | N/A | A set of 4×6 inch glossy prints is $8; $14 for true black & white prints | No, about $5.95 | 1 – 2 weeks | |
$38.98 for color; $40.98 for b&w; $44.98 for slides (1025 x 1450 at 3 – 5 mb) | $9.47 for color and black & white; $17.99 for E-6 film (slide) | Set of 4×6 in / 4.5×6 in / 5×5 in prints cost $3.60 | No | 1 – 2 weeks | |
$15 for color; $17 for b&w; $18 for slide film (unmounted) | $10 for color; $12 for b&w; $13 for slide film (unmounted) | Set of 4×6 inch prints cost $4; A set of 5×7 inch prints cost $7 | No, $5 + $.50 for each additional film roll | 1 – 2 weeks | |
$48.50 for C-41, $50.25 for b&w, $53.50 for E-6 (slide) | $8.50 for C-41, $10.25 for b&w, $13.50 for E-6 (slide) | A set of 4×5 inch prints cost $21.60 | No | 1 – 2 weeks | |
$26 for color: $27 for b&w; $28 for slide film | $16 for color: $17 for b&w; $18 for slide film | A set of 4×5 inch prints cost $6 more | Yes, price includes free shipping there to facility and back | 2 – 3 weeks | |
$24.95 for color 110 with digital scans | $4.99 for color 110 only without scans or prints | $19.99 for development and 4×6″ prints | No | 1 – 2 weeks |
Based on the chart above, I’d recommend either Dwayne’s Photo or The Darkroom for 110 film development based on price, turnaround time, price of scans, and how easy the ordering system is to use.
For information on h o
o w to package your film for mailing when developing film
  to these places see this guide.
How to Develop 110 film at Home?
Developing 110 film at home is as easy as developing color film  or black & white 35mm (or 135)
 or medium format film (120). However, most film tanks for developing film at home aren’t able to get small enough to hold 110 film so you need to purchase a special film reel (like this one for a Patterson Tank on Etsy
 ) that is able to get small enough to load to film on it for development.
You also need to get the film out of the film canister before you can develop it and it has its challenges. There are two ways to get film out of a 110 film cassette: Cut the film out of the film cassette or stop winding film to pull it out of cassette (the easiest method).
Method #1: Cut the film out of the film cassette
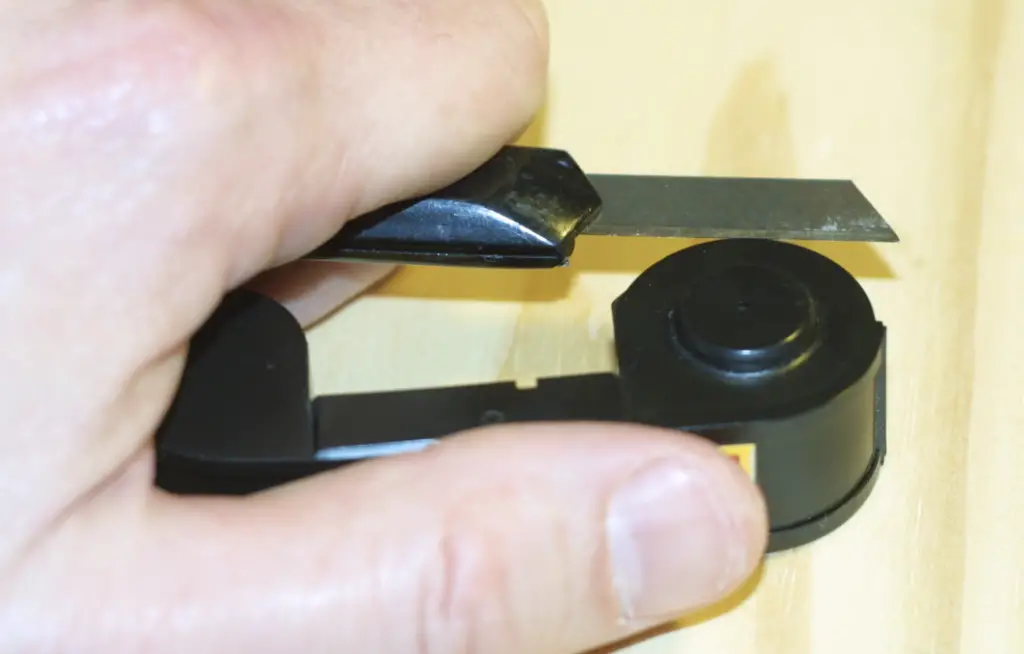
To first way to remove 110 film from the film cassette is to cut the film out of the film cartridge follow the steps outlined in this guide . Keep in mind that Lomography film cassettes are easier to cut open than older 110 film cassettes. In general, the steps are as follows.
- First you will need to score the top with a razor to open the top of the film cartridge following the plastic welds.
- Locate the seam on the two bulbous supply and take-up chambers on either side of the film cartridge
- Go into an environment without light or a film changing bag
- Carefully take the razor knife and try to separate that seam by seating the blade into the seam and rotate the knife along the chambers.
- Cut through the seam on both the supply and take up chambers
- At this point the film cassette should be open enough to pull the film out and able to load onto a film developing reel that is size correctly
 and Develop the film like you would develop color film
  or black & white film
 using the correct chemistry for the film type
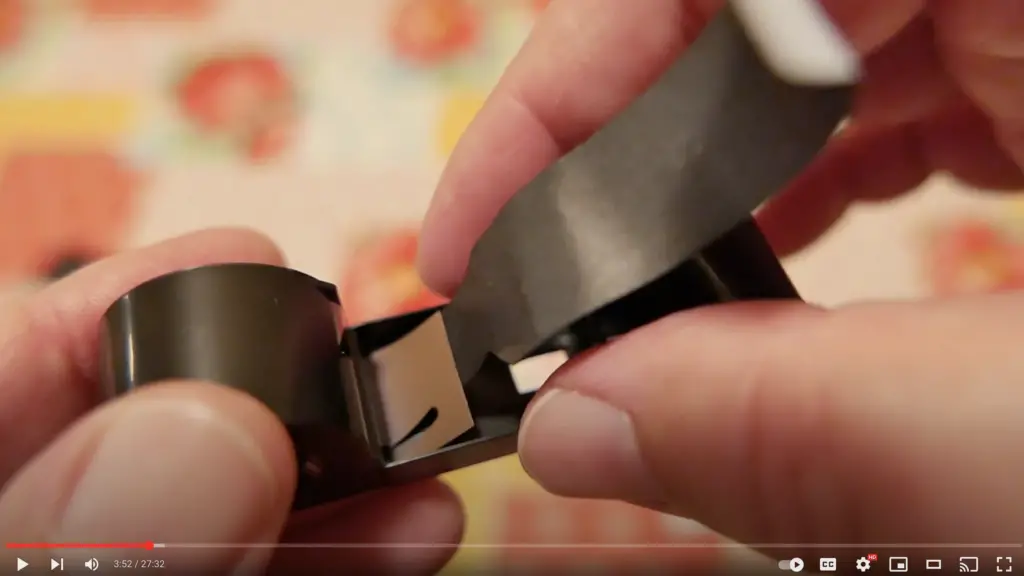

Method #2: Wind Film So You Can Pull Film Out of 110 Film Cassette
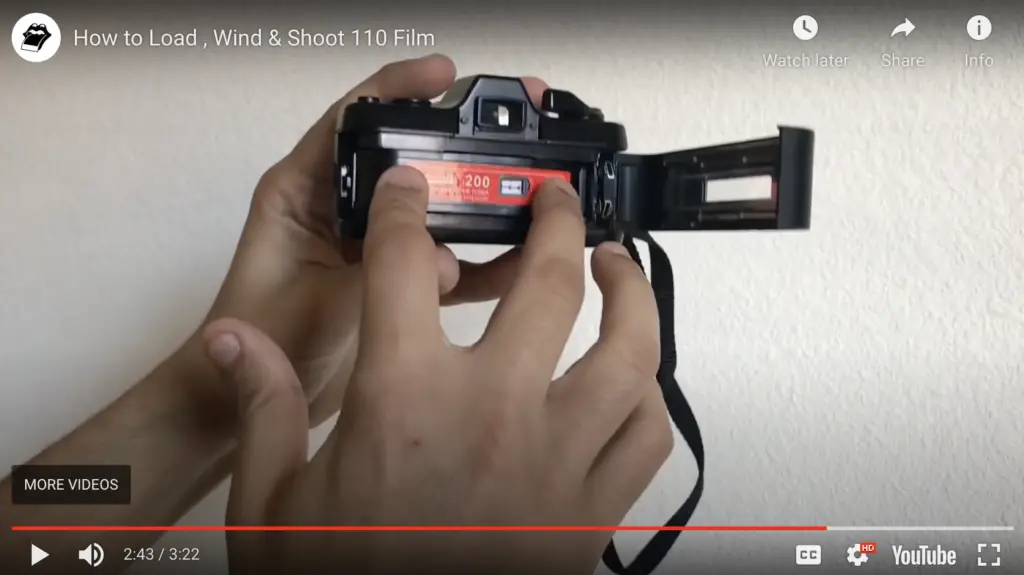
The easier method to remove 110 film from the cassette comes from a guide on youtube by Room 111 Photography and is to stop winding the film at a certain point so you can pull the film out of the cassette. (This can only be done with non-automatic winding 110 cameras.)
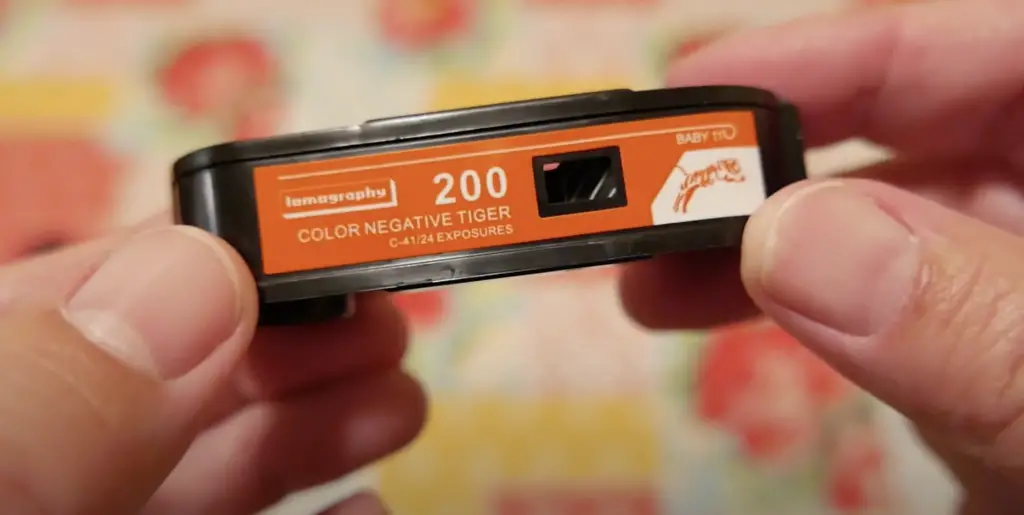
- When you are winding the film after the last shot, stop winding the film until the last black part of the backing paper is still viewable in the frame counter window.
- Unload the film canister from the camera and flip the film canister over. You should find the 110 film leader sticking out.
- Pull the backing paper out with a dental hook bent paper clip
- Move the film canister into an environment without light or a film changing bag so the film doesn’t get exposed to light
- Load the film into a correctly size film reel (like this one for a Paterson Developing Tank on Etsy
 ) and load it into a film developing tank
 - Remove it from the film changing bag or dark environment
- Develop the film like you would develop color film
 or develop black & white film
 using the correct chemistry for the film type
How Many Shots are in a 110 Film?
Originally, 110 film cartridges came with 12, 20, or 24 exposures but modern 110 film, entirely produced by Lomography, comes with 24 shots. This means that you can only take up to 24 pictures on a single roll of 110 film . The good news is 110 film canisters are very small, so multiple cassettes will be able to easily fit in your pocket or bag along with your camera.
Can You Rewind 110 Film?
110 film doesn’t need to be rewound like other films. One of the reason’s 110 was created, like 126 film, was to remove the step of having to rewind film back into the film canister to make loading and unload film in and out of a camera much easier.
What Cameras Use 110 Film?
As far as cameras go, no camera have such a aesthetic variety as the 110 film format (except maybe Fujifilm Instax Mini  cameras and early 1990’s digital cameras). There are so many types of 110 cameras made by many companies like Holga, Minolta, Pentax, Nikon, Canon, and other novelty 110 cameras (mostly used for advertising). 110 cameras truly came in all kinds of sizes and styles – even some so small that can fit onto your key ring!
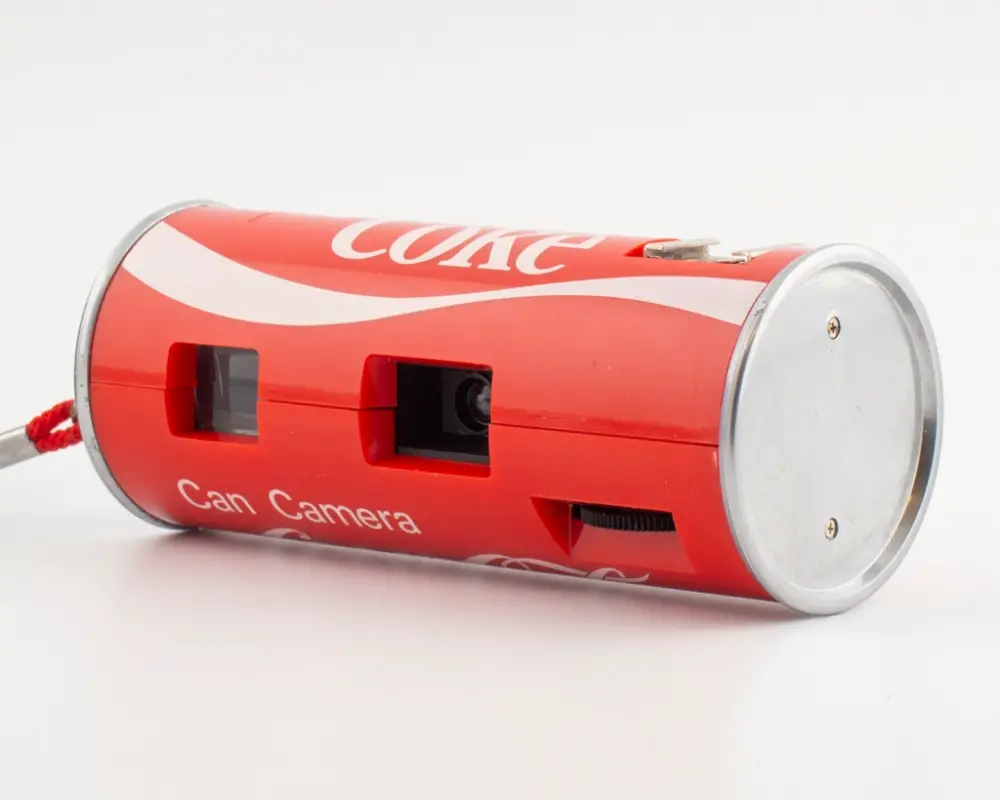
There are not many 110 cameras being made today (the most recent 110 camera being made was the Diana Baby 110 and can be found for sale here
 ) so most are vintage (read: finicky) and most like the long, flat rectangle version you’ve undoubtedly seen, only have point-and-shoot capabilities.
Here are a few 110 camera that I found interesting:
- Kodak Brownie – Kodak produced a 110 camera similar to the original brownie camera between 1980 and 1982 and didn’t need a battery. It was also one of the last cameras in the Brownie series by Kodak and designed for the 100th anniversary of the founding of Kodak in 1980. (see it here
 )
) - Kodak Brownie II – One of the last brownie cameras from Kodak made in 1987. It began the look of the long, flat rectangle cameras that most people associate with 110 film cameras. (see it here
 )
) - Rollei A110 & E110 – small 110 cameras with a sharp lens and exposure controls (see this great review on 35mmc.com
 )
) - Agfamatic 2008 Tele Pocket camera – a tiny 110 camera with all the bells and whistles (see this great review on casualphotophile.com
 )
) - Minolta Weathermatic – a waterproof 110 camera (see this great review on aperturepreview.com
 )
) - Tasco Binocular and camera 8000 – binoculars with a built-in 110 camera so you could take pictures of what you are seeing with 110 film (see it here
 )
)
There were a few 110 SLR cameras made in addition to the point & shoot cameras to make composing and focusing easier and the SLR cameras are some of the most popular and sought after.
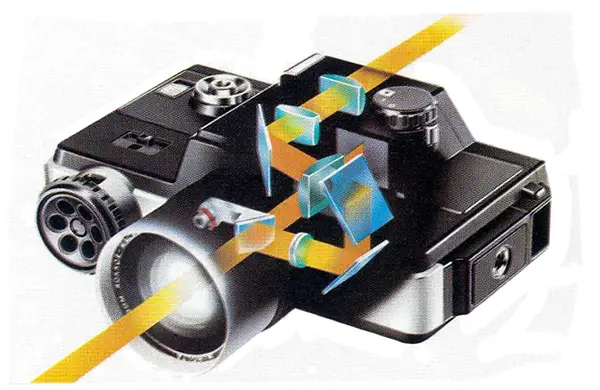

- Pentax Auto 110 – the world’s smallest SLR and one of the most popular 110 camera due to the sharp and interchangeable lenses and exposure controls (see it on Amazon and see this great review on youtube
 )
) - Minolta 110 Zoom SLR – A crazy looking camera that resembles something from an old science fiction show but it’s amazing what tech they were able to fit into it (see it here on Amazon and see this great review on youtube
 )
) - Minolta 110 Mk II – a tiny SLR for 110 film that zooms and has some exposure controls (see it here on etsy
 and see this great review on youtube
 )
)
How to Tell If Your 110 Film is Used?

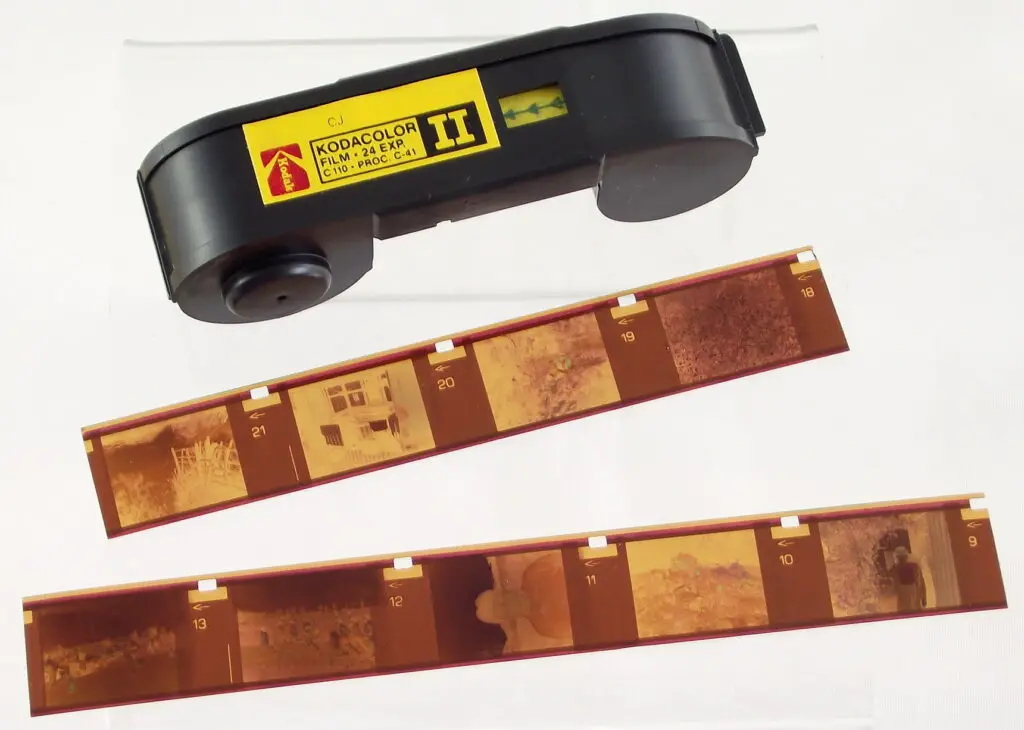
You can tell whether or not 110 film has been used by looking in the small frame exposure window on the back of the camera. If the film has not been used, there will be small arrows. It will also have a tail on the side of the canister. If you see the arrows or a tail in a canister of 110 film, you can use the film to take photos.
If there are no arrows to be seen in the window, the film has been used. However, if there are no arrows present in the window but instead showing diagonal black and white lines or black paper then the film is used and ready to be processed. You may also see a number showing in the small window, this means how many shots have been taken on the roll. Most all 110 film can take either 12, 20, or 24 exposures with most modern 110, like 110 film made by Lomography, can take 24 exposures.
See this guide for more information about used or unused film , including 110 film.
How Do You Load and Unload 110 film?
It is extremely easy to load and unload 110 film. All you have to do is open the film compartment on your 110 camera and push the film cartridge in. Then, you can take all of the pictures that you want until you run out of film exposure (see this guide on how to know your 110 camera is out of film or this guide to know if your 110 film is used or unused ). To unload a 110 film canister you just open the film compartment door and pull the film out.
If you would like to see a visual representation of how to load 110 film into various 110 cameras, watch the video below:
How Do I Scan 110 Negatives?
110 film negatives, like most film negatives, can be scanned using a flatbed scanner like the Epson v600. The Epson v600 is a great, inexpensive flatbed scanner, meaning whatever you scan stays flat, and in my experience scans negatives very well. However, if you want higher quality or the ability to scan large negatives, I suggest looking at either the Epson V750, or Epson V850 at a much higher prices.
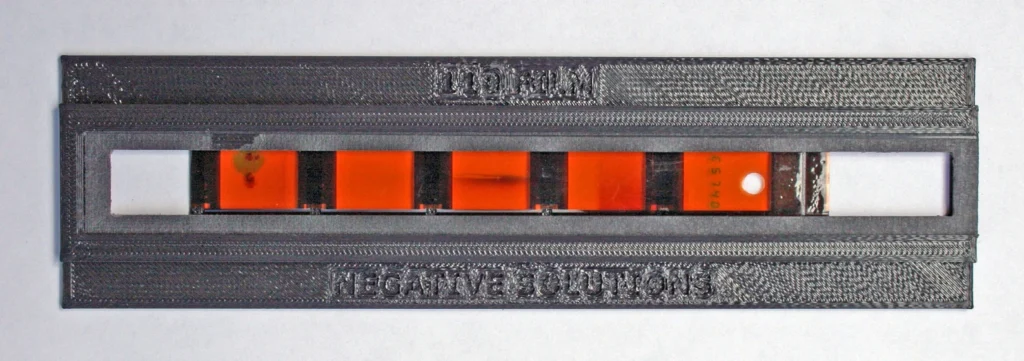

While you can get film holder for common formats of like 35mm (135) film and slides, medium format film, and others you may have to specifically search out a film negative film holder for your 110 negatives (such as this one Amazon which runs around $27) to keep your film negatives in place while you scan them.
Here is a great video on youtube explaining how to use the Epson v600 to scan negatives as well as using the Epson software to reverse the negatives correctly.
Does 110 Film Go Bad?
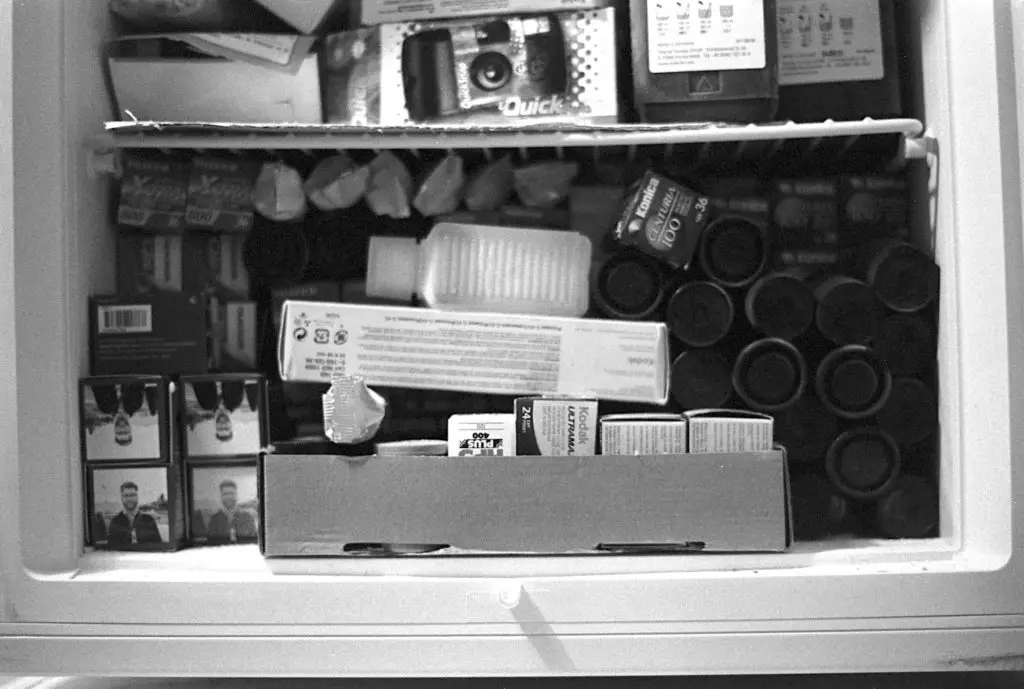
110 film does go bad, but it takes more than 10 years to expire. The lifespan of film is extremely long and can be extended if stored properly, which means storing the film in the freezer or a cold, dark, and dry room.
Expired 110 film can still be used, but the colors will not be vibrant and will be of extremely low quality. You will have to be extra cautious when using old and expired film if you want the pictures to turn out relatively well but that is part of the fun of using expired film – not know what it will look like!
You can determine whether or not 110 film has expired by looking for an expiration date on the film packaging. If your film is without a box, then the only way to know if it is expired is to develop it.
The rule of thumb if you don’t know how the film was stored is to give the film 1-stop of light per decade that it is expired. However, few 110 cameras had exposure controls so you don’t have a way to change the amount of light coming into the camera and you are stuck with what you get.
110 Film vs 35mm Film?
110 film was created to be much easier to load and unload film into and out of camera than 135 (35mm) film to limit user error that resulted in the film not recording images. 110 cameras are also smaller, easier and cheaper to manufacture since they often don’t have as many electronic parts, and much easier to use because you just have to point and shoot.
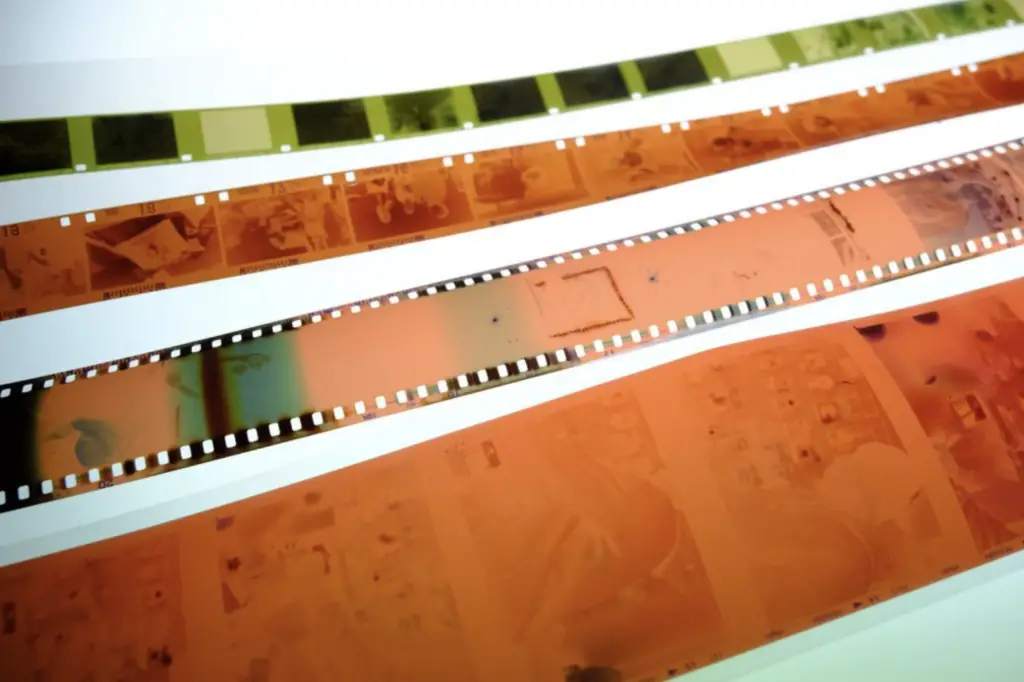
However, many people still prefer to use the larger 35mm (135) film over 110 film because since the film is larger the resolution is better, the resulting photos are sharper which makes the photos easier to enlarge past 4×6 inches, and you have more control over the exposure with 35mm (135) film cameras. Since 35mm (135) film is the standard size of film more stores will develop 35mm at a much cheaper and faster rate than the 110 film but there are still places that will develop 110 film but it is more expensive than 35mm film. For example, it is $6 for 35mm film development at Dwayne’s Photo versus $15 to develop 110 film
  at same store.
Is 110 Film the Same as 16mm Film?
110 film and 16mm movie film are similar in width and development, however the main difference between 110 and 16mm film is the width of the perforations that tell the camera how long long the film negatives are on the film strip. The perforations between the negatives on 110 film are 25mm apart while the perforations on 16mm film are 8mm apart. This is because 16mm film moves through the camera vertically while 110 film moves through the camera horizontally allowing the negatives to be larger.
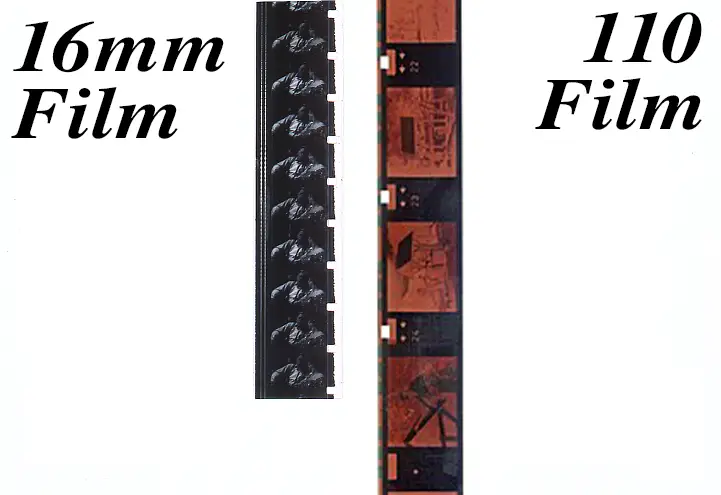
Because 110 and 16mm film are the same width, you can reload 110 film canisters with 16mm film. If you use 16mm film in a 110 film canister, the film will stop before all of it is used, so you will only be able to take a limited number of pictures. The images will also overlap. This is partially because of the difference in where the perforations are located on the film strips.
How to Store 110 Film?
110 film should be stored just like any other roll film . If it is color film or slide the film It should be kept in a cold, dark, and dry place like a freezer or refrigerator. This will preserve the life of the film beyond its expiration date and keep the film fresh for when you decided to shoot it. If the film is black & white you can keep it in the fridge or freezer but it isn’t necessary – just keep it in a cool, dark, and dry place.
Other tips for storing 110 film is to keep the film in its box and foil packaging, which will help battle the humidity inside and protect the film. Before using the film when storing it in the freezer or refrigerator, make sure to take it out of the freezer and let it defrost for a few hours before using it.
In Summary
110 film is an unique film that was popular from the 1970’s – 1990’s. It has made a comeback with Lomography making film starting in 2011 with film currently being made and new film coming out. Lomography is the largest producer of 110 film but you can also find old or expired 110 film form other companies online. 110 film can still be developed by Walgreens, Walmart, or CVS for around $9.96 – $14.99 (USD) for scans and a set of 4 x6 inch prints (but won’t return your negatives) or other processing labs that can develop 110 film in store or through the mail for $15 – $38.98 with digital scans or $10 – $20 without scans of your film from online film development labs .
.
110 film is about 60% smaller than 35mm film and 24 exposures is the most common amount of frames. 110 film is the same width as 16mm movie film but the perforation holes that tells the camera where to stop is further apart on the 110 cameras so if you use it in the camera be aware. Storing 110 film is the same as other color, black & white, or slide film – in a cool, dark, and dry location like a refrigerator or freezer. If storing in a freezer or refrigerator be sure to let is sit to defrost for a 4 hours before using it.
There were a many 110 cameras made but were mostly just point and shoot cameras for ease-of-use but there were also some SLR 110 cameras made that are very popular like the Pentax 110 Auto, the world’s smallest SLR and has sharp interchangeable lenses. If you want to scan 110 film, you will need a 110 film scanner mask to hold the film down for scanning on a flatbed scanner (such as this one Amazon which runs around $27).

